Plate 11.
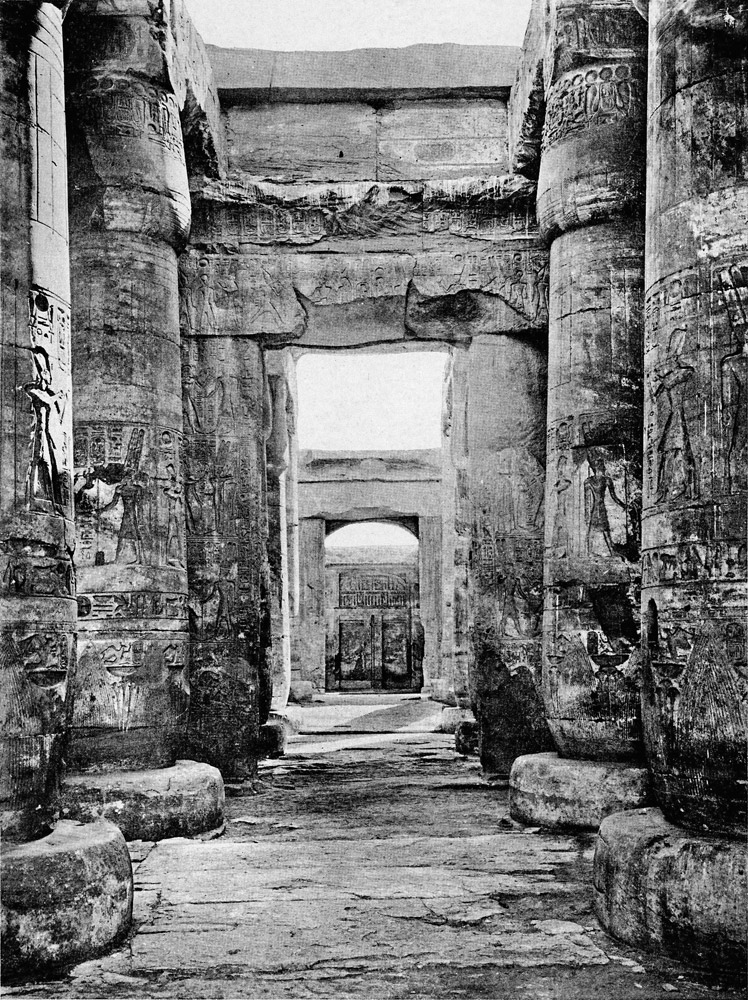
The bay of Amun in the Hypostyle Hall, and the Sanctuary of Amun
[in the distance].
The bay of Amun in the Hypostyle Hall, and the Sanctuary of Amun
[in the distance].
THE TEMPLE OF SETI I AT ABYDOS
Abydos: Le Temple de Séti Ier,
Jean Capart, 1912.
Plates and Illustrations from the publication by the Musées Royaux, Brussels.
The Foundation’s project to make the Temple of Seti I at Abydos better known to the public commences with this online publication of the illustrations which appeared in 1912 in a rare book published at Brussels by the Musées Royaux. The book was entitled Abydos: Le Temple de Séti Ier, with a lengthy introductory essay (not reproduced here) written by Jean Capart.
The volume was inspired by a conference held at the Musée Guimet in Paris on March 5, 1911, and Jean Capart acknowledges the permission of that Museum to publish his essay (which was his 1911 conference paper), and dedicates the volume to John Garstang. The book was published with no copyright notices and hence entered the public domain at the date of publication. There is no indication in the volume of the name of the photographer who took the photographs. The only illustration which is credited is an anonymous redrawing of the plan of the temple from that published in The Temple of the Kings at Abydos (Seti I.) by A. St. G. Caulfeild, London, 1902.
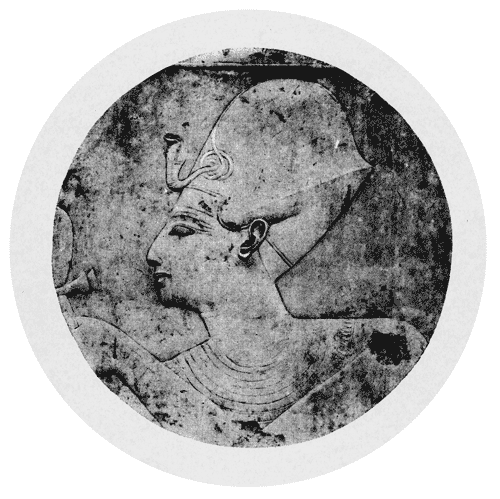
Plate 9. Pharaoh Seti I. Detail from one of the walls of the temple.
The illustrations which follow all appeared without accompanying text, only with the briefest of captions. The first seven are labelled as Figures 1-7 in the book and appear within Capart’s introductory text as small illustrations. Then follows an unnumbered portrait of the head of King Seti I in profile, with no identifying caption. The remaining illustrations are all full page in size (with no pagination given) and are labelled as Planches (Plates), numbered 1-50 in the book, followed by the final illustration at the back, which is unnumbered, and is the plan of the temple. For the purposes of this publication online, a consecutive numbering has been adopted, which ignores the difference between a ‘Figure’ and a ‘Planche’. All illustrations have been scanned in high resolution. They appear here numbered 1 to 59, with ‘Plate 1’ constituting Number 9, ‘Plate 50’ constituting Number 58, and the temple plan as the final illustration numbered here 59.
PLATES
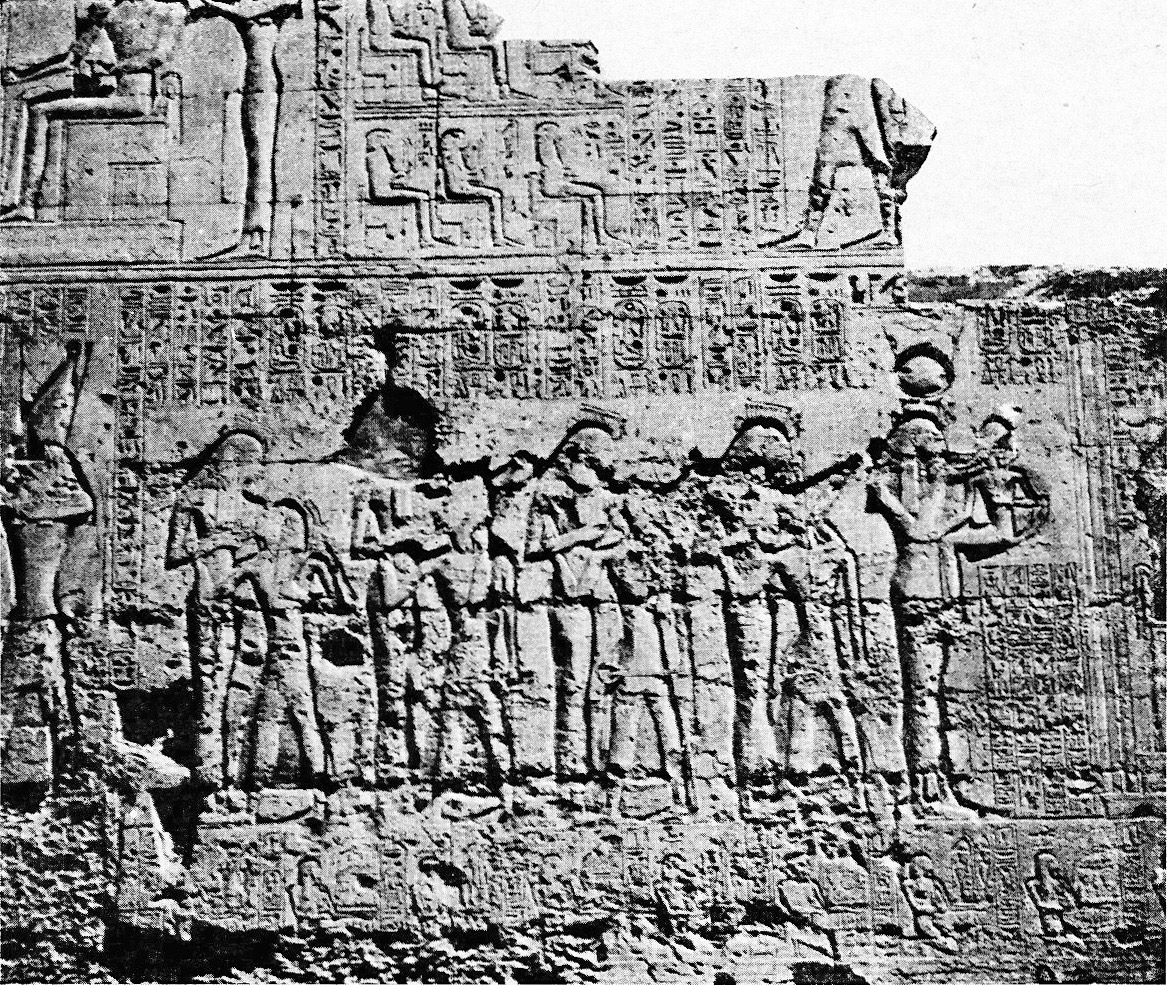
Plate 1. Rameses II suckled by the goddesses.
First Hypostyle Hall, south wall.
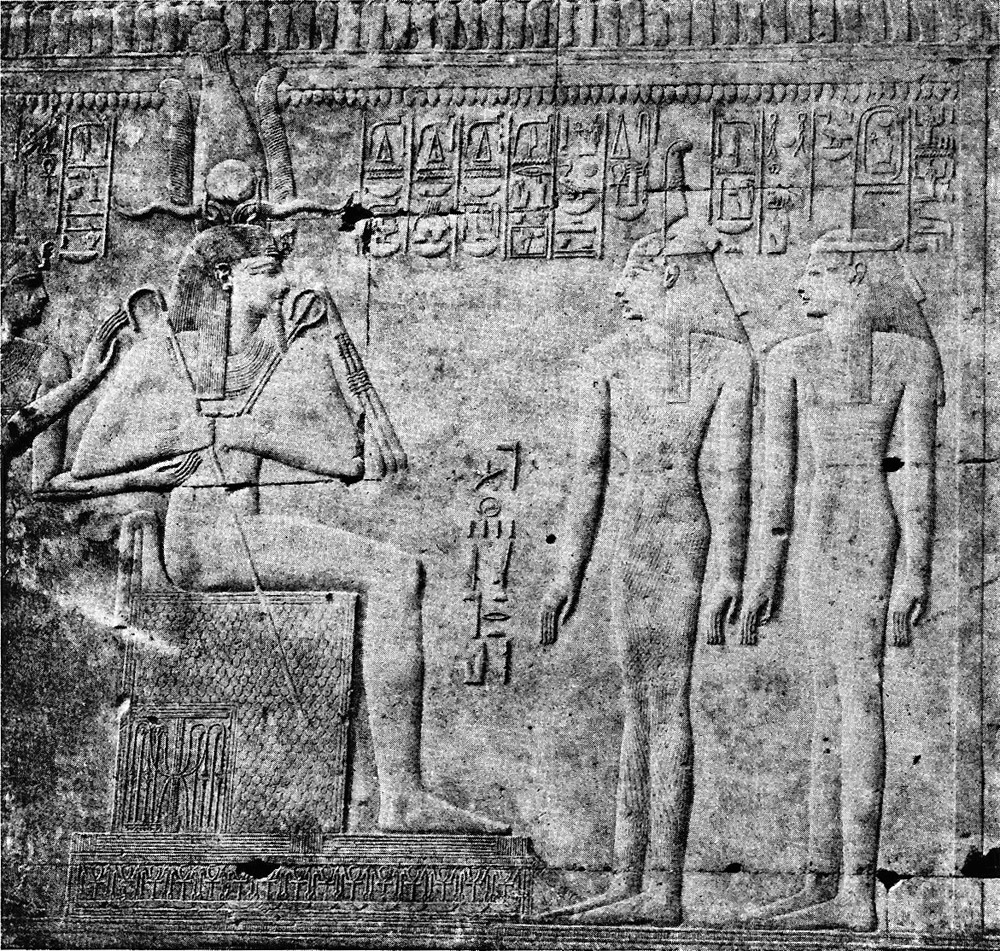
Plate 2. Osiris and the goddesses (from Mariette).
Second Hypostyle Hall north wall.
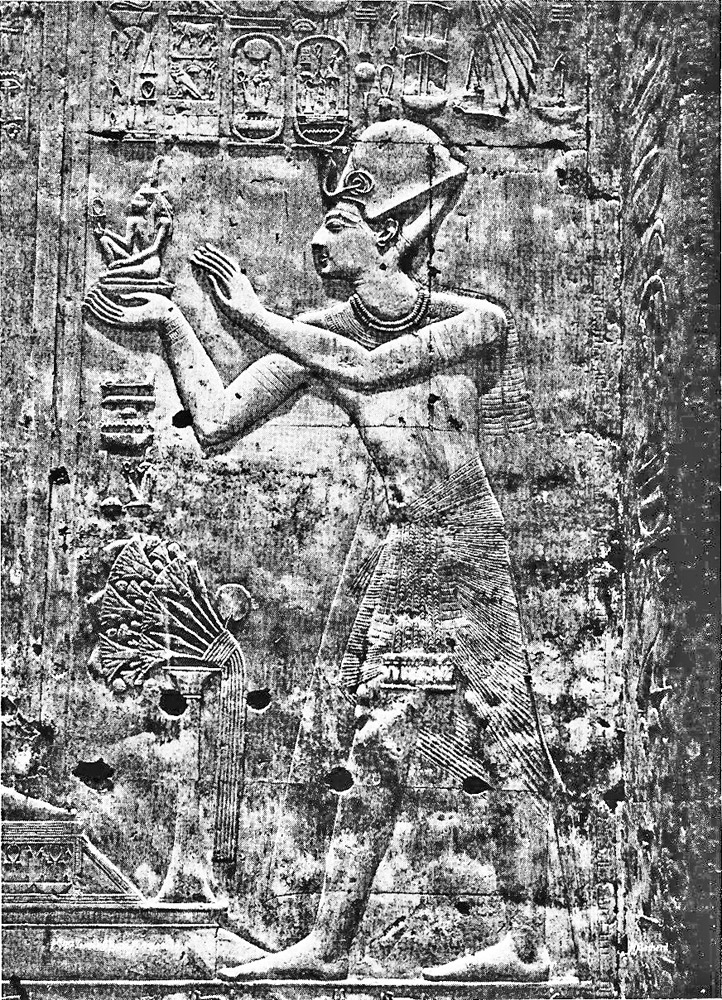
Plate 3. Seti I offering the Truth [Maāt] to Osiris (from a photo by Henry Béchard).
Second Hypostyle Hall, north wall.
Second Hypostyle Hall, north wall.
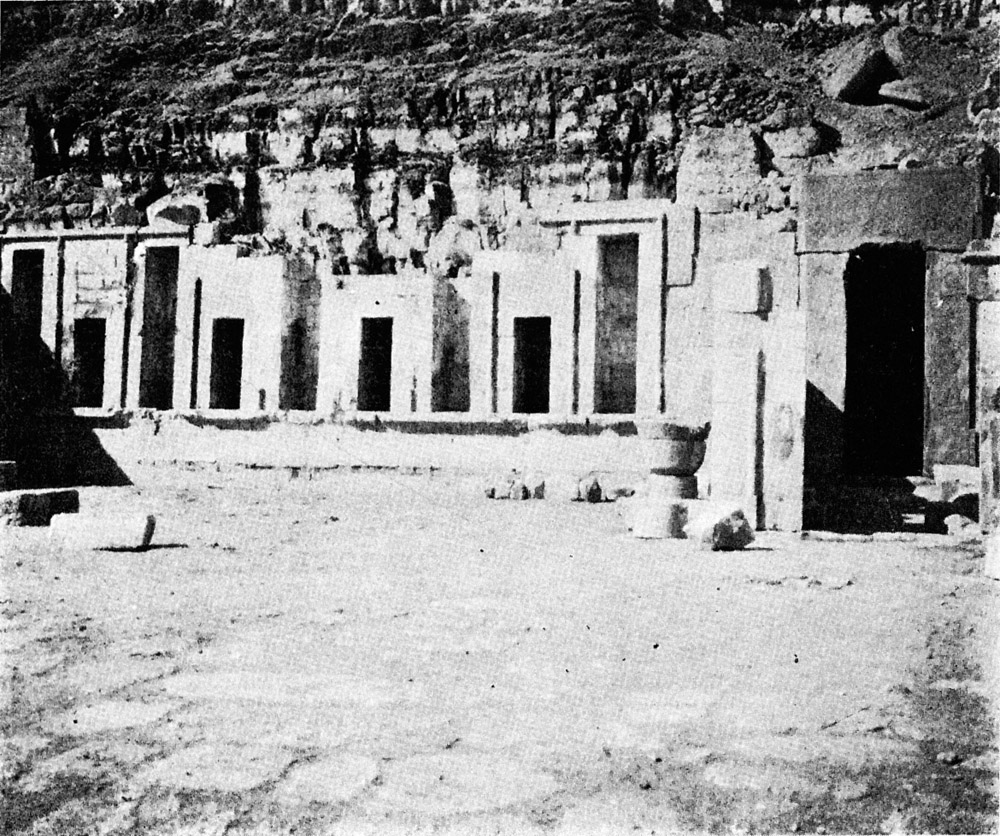
Plate 4. The niches of the Upper Terrace at the Temple of Deir el Bahari.
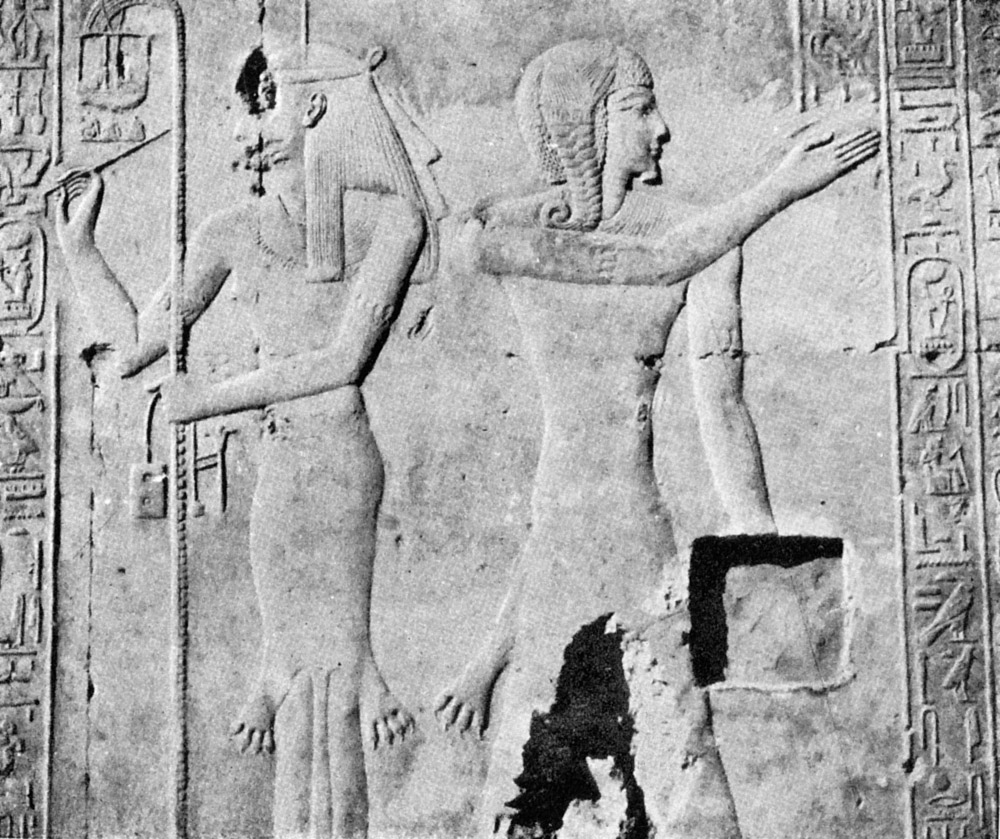
Plate 5. The priest Anmoutef and the goddess Sheshet. Sanctuary of the King, north wall.
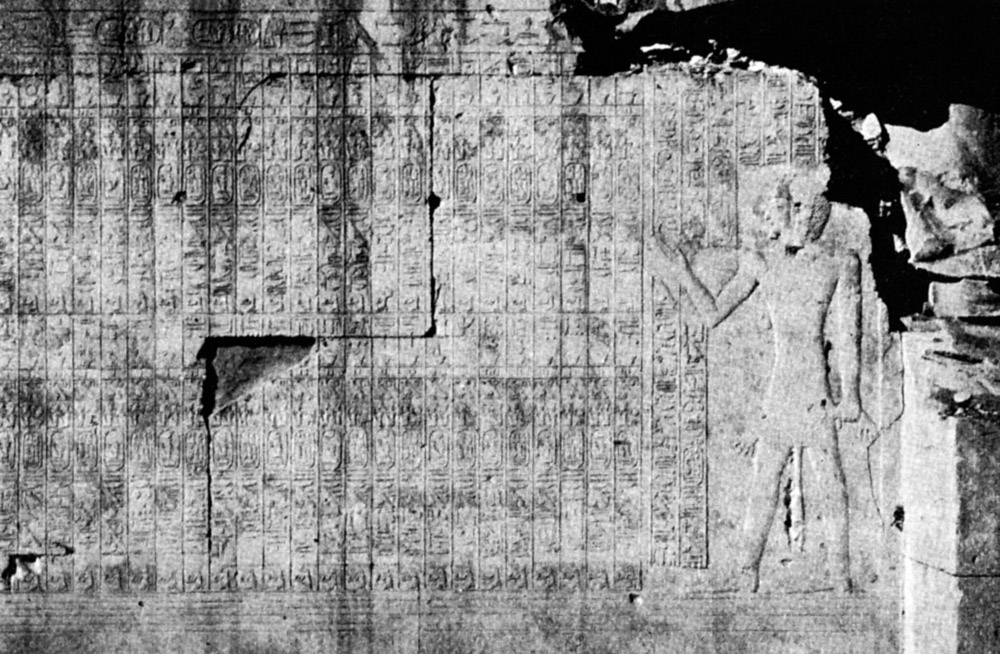
Plate 6. The priest Anmoutef reciting the list of offerings.
Sanctuary of the King, north wall.
Sanctuary of the King, north wall.
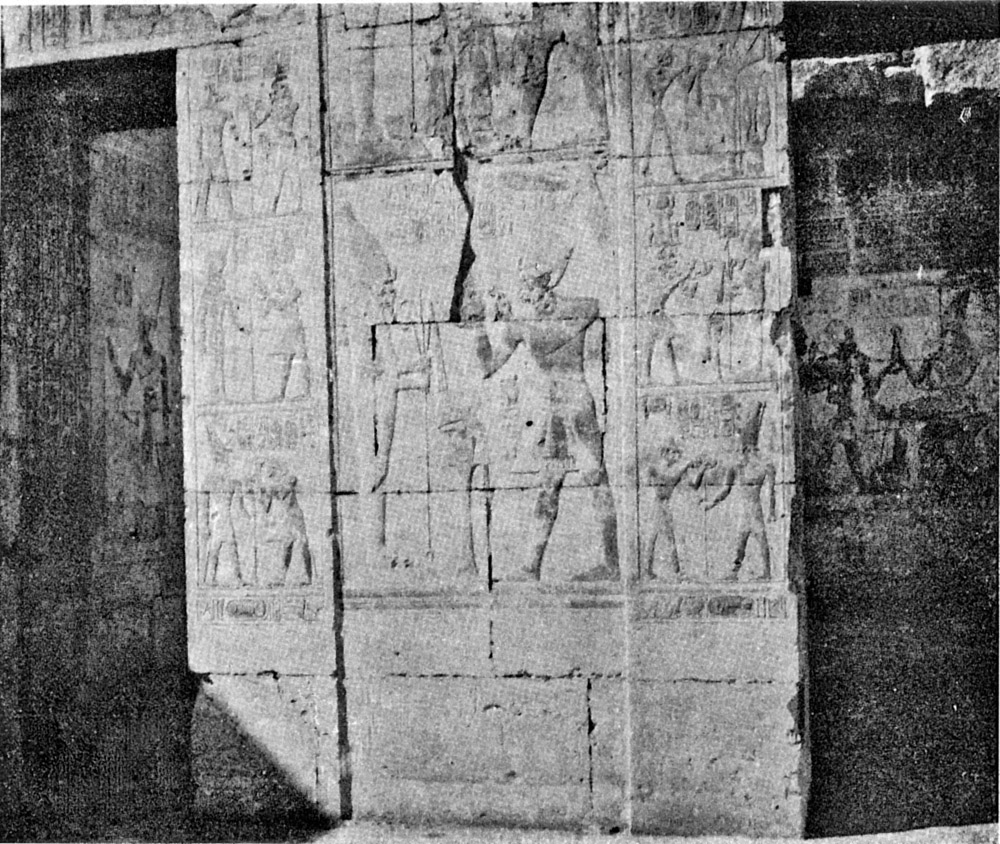
Plate 7. Scenes of adoration of Osirian divinities.
Wall between the doors of the Chapels of Osiris and Horus
Wall between the doors of the Chapels of Osiris and Horus
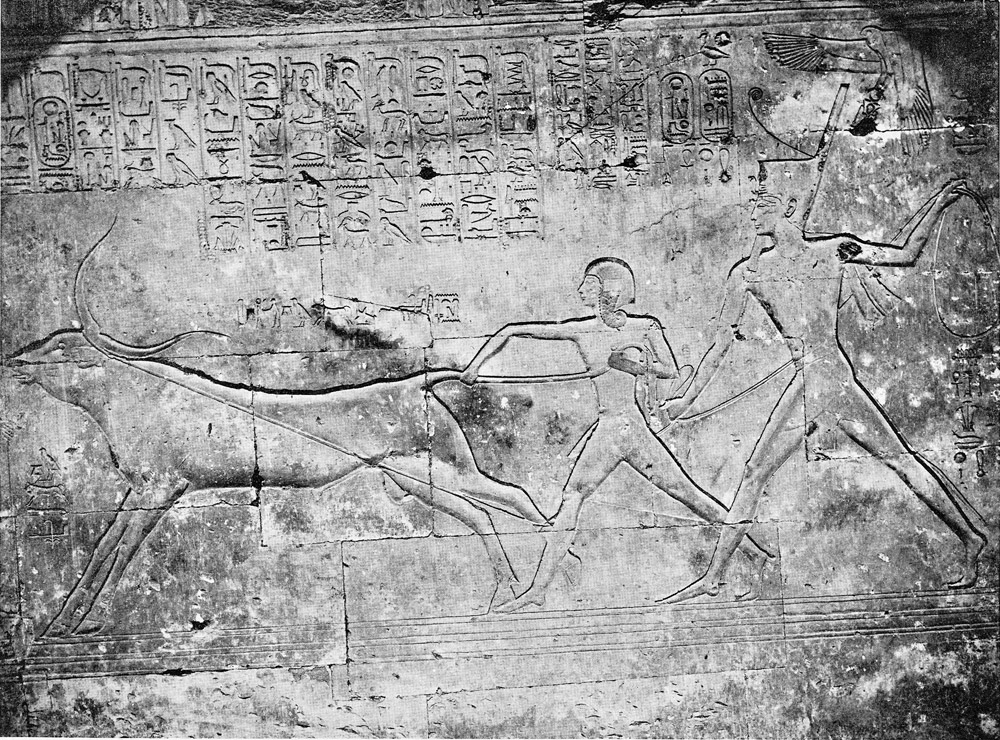
Plate 8. Stair Corridor. North wall, first part. (Plate XLVIII)
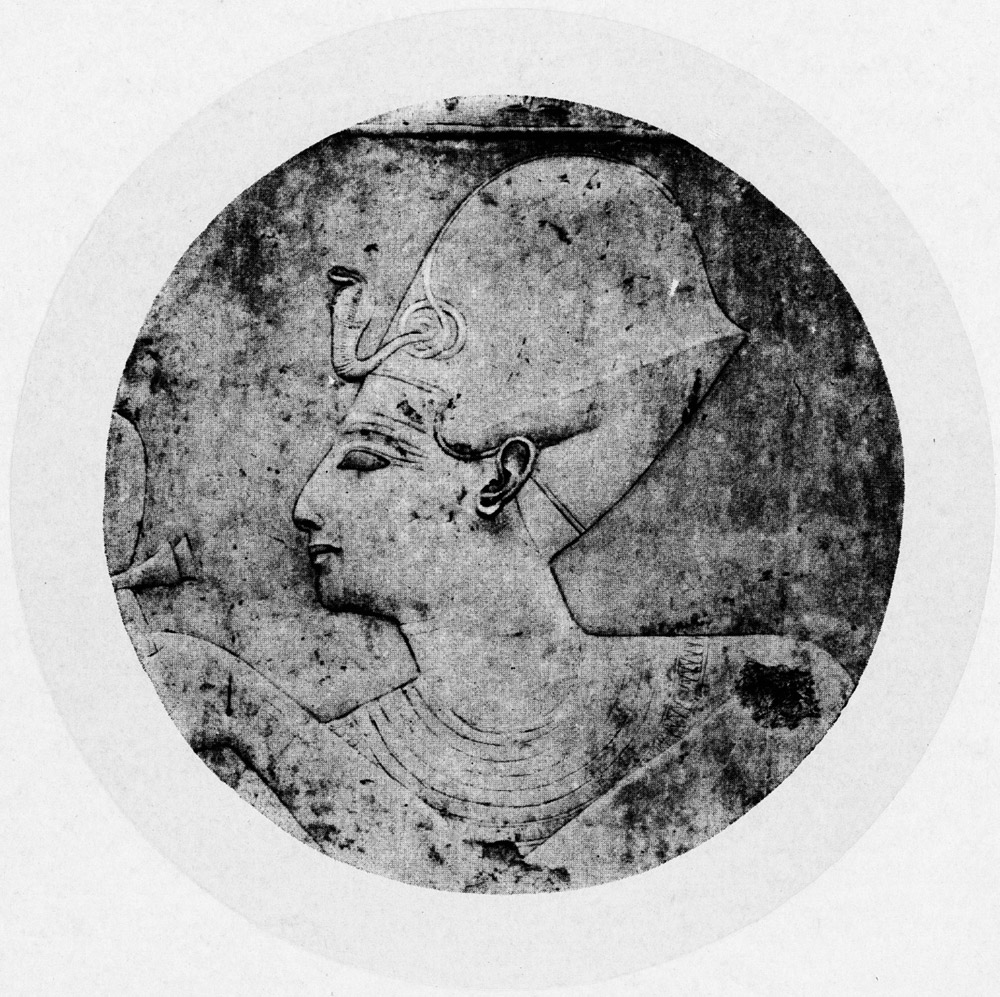
Plate 9. Pharaoh Seti I. Detail from one of the walls of the temple.
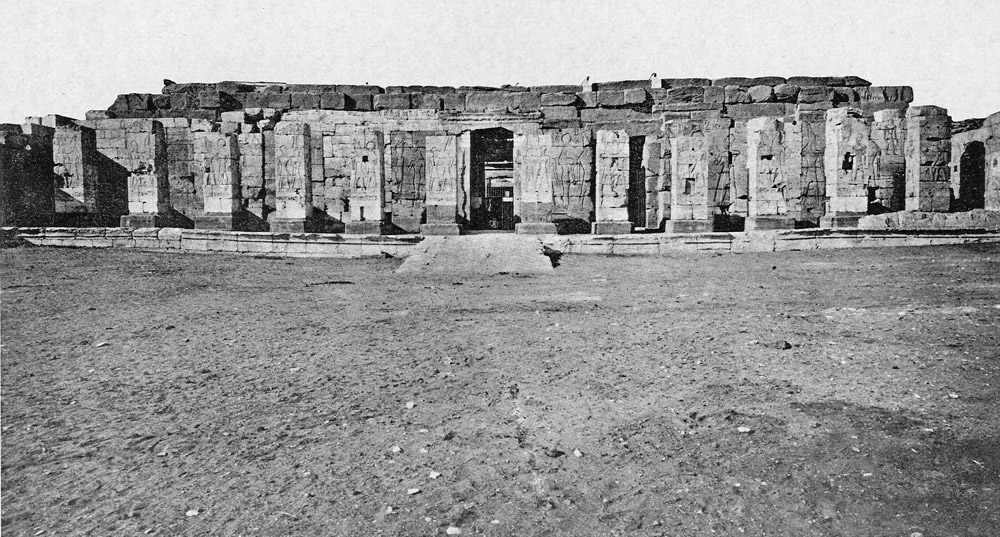
Plate 10. The portico of the Second Court. In front of the First Hypostyle Hall.
Plate 11. The bay of Amun in the Hypostyle Hall, and the Sanctuary of Amun [in the distance].

Plate 12. First Hypostyle Hall.
Side view.
Side view.
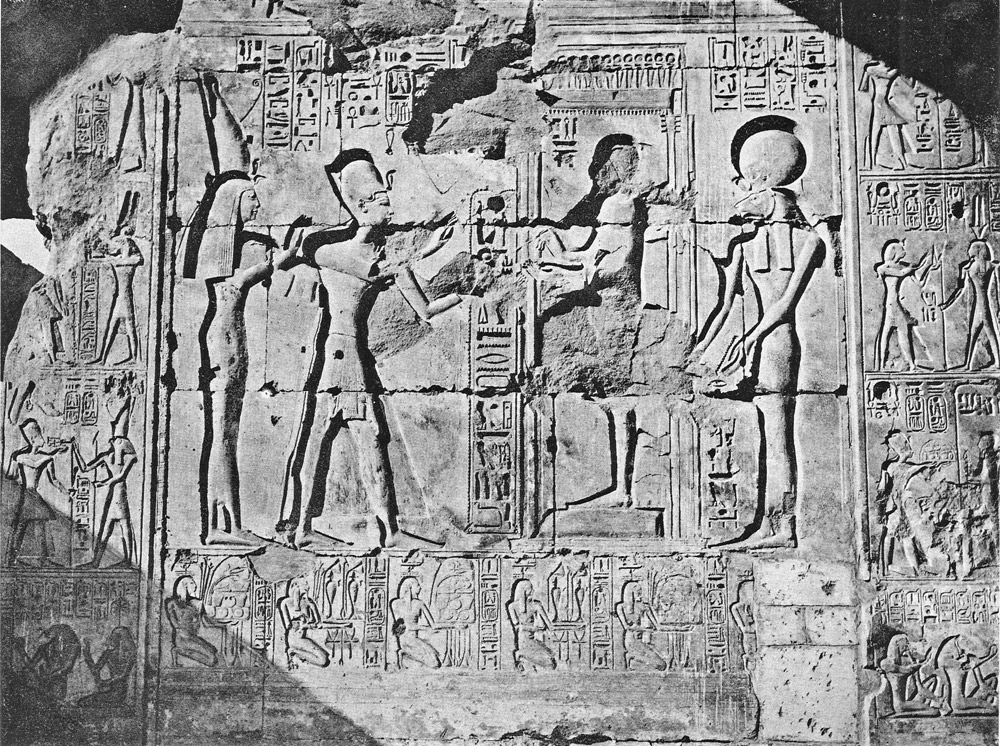
Plate 13. First Hypostyle Hall.
Side view.
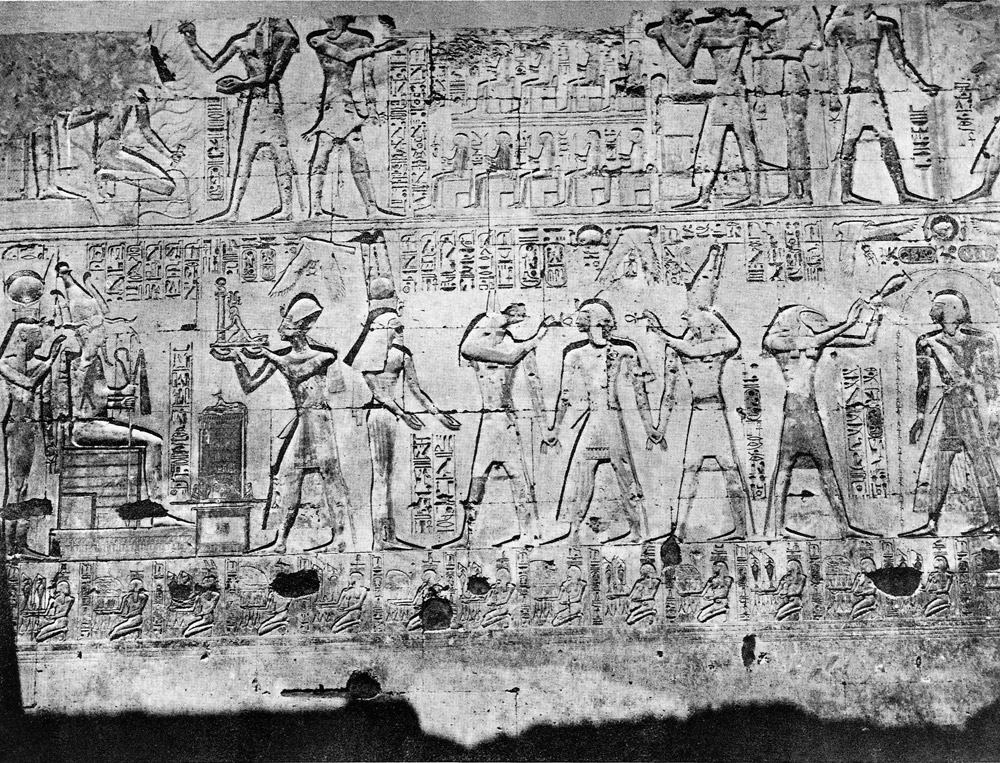
Plate 14. First Hypostyle Hall. North Wall.
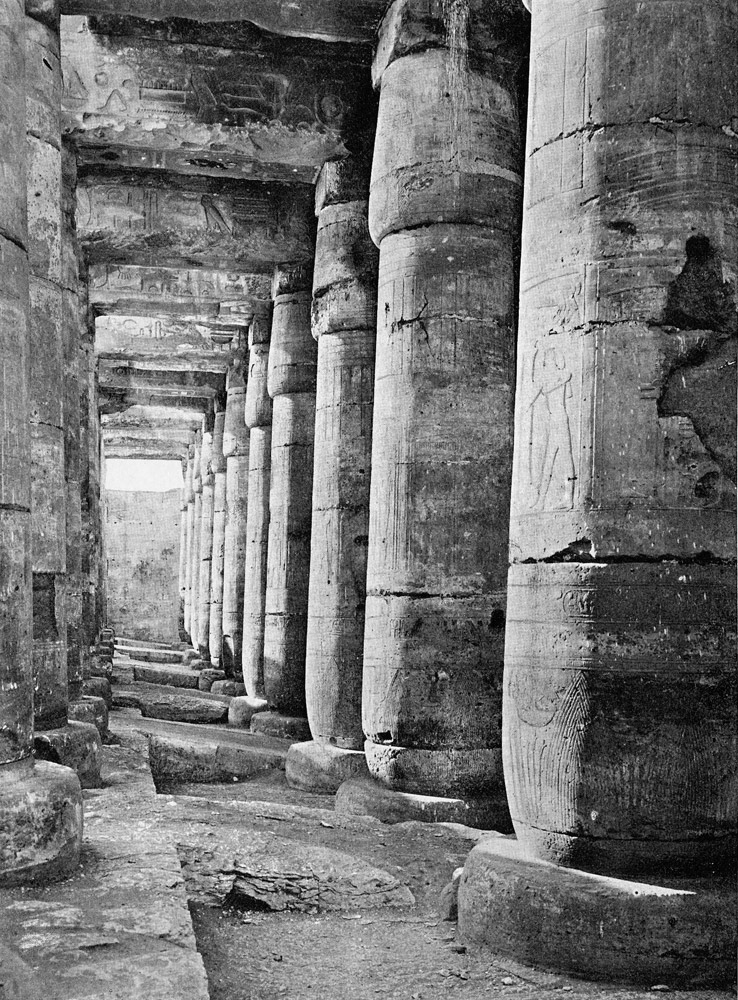
Plate 15. Second Hypostyle Hall.
View from the side between the second and third rows of columns.
View from the side between the second and third rows of columns.
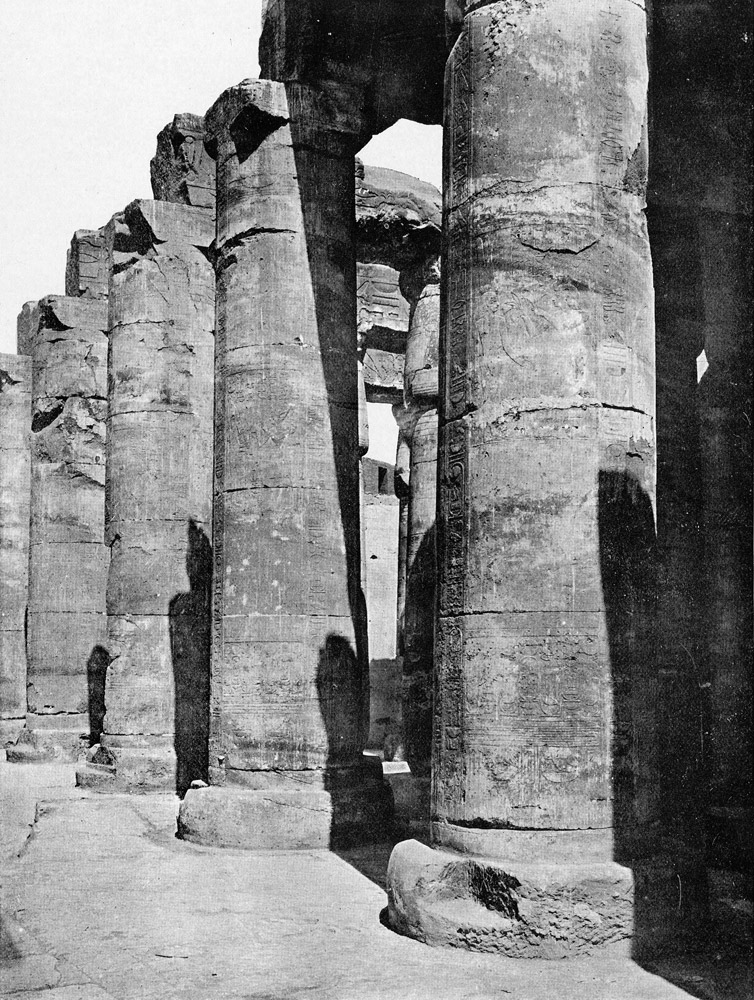
Plate 16. Second Hypostyle Hall.
View at an angle.
View at an angle.
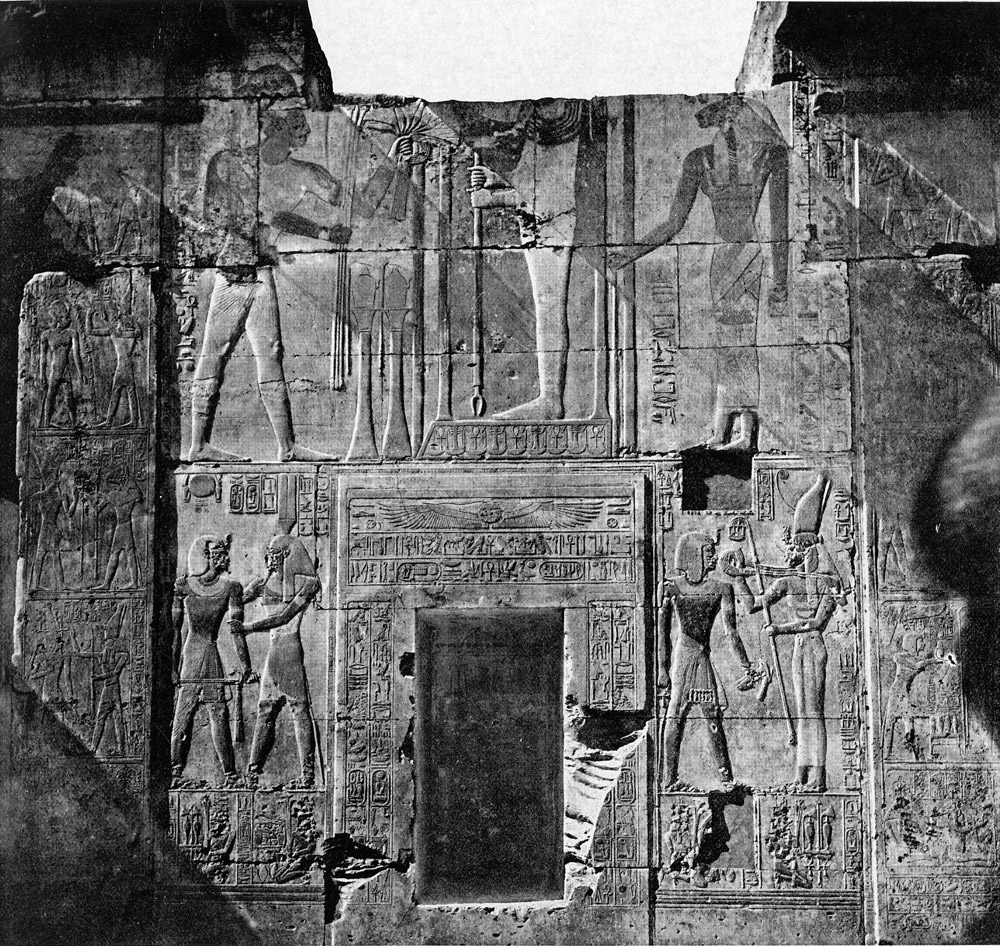
Plate 17. Second Hypostyle Hall.
Wall between the Sanctuary of the King and the Sanctuary of Ptah.
Wall between the Sanctuary of the King and the Sanctuary of Ptah.
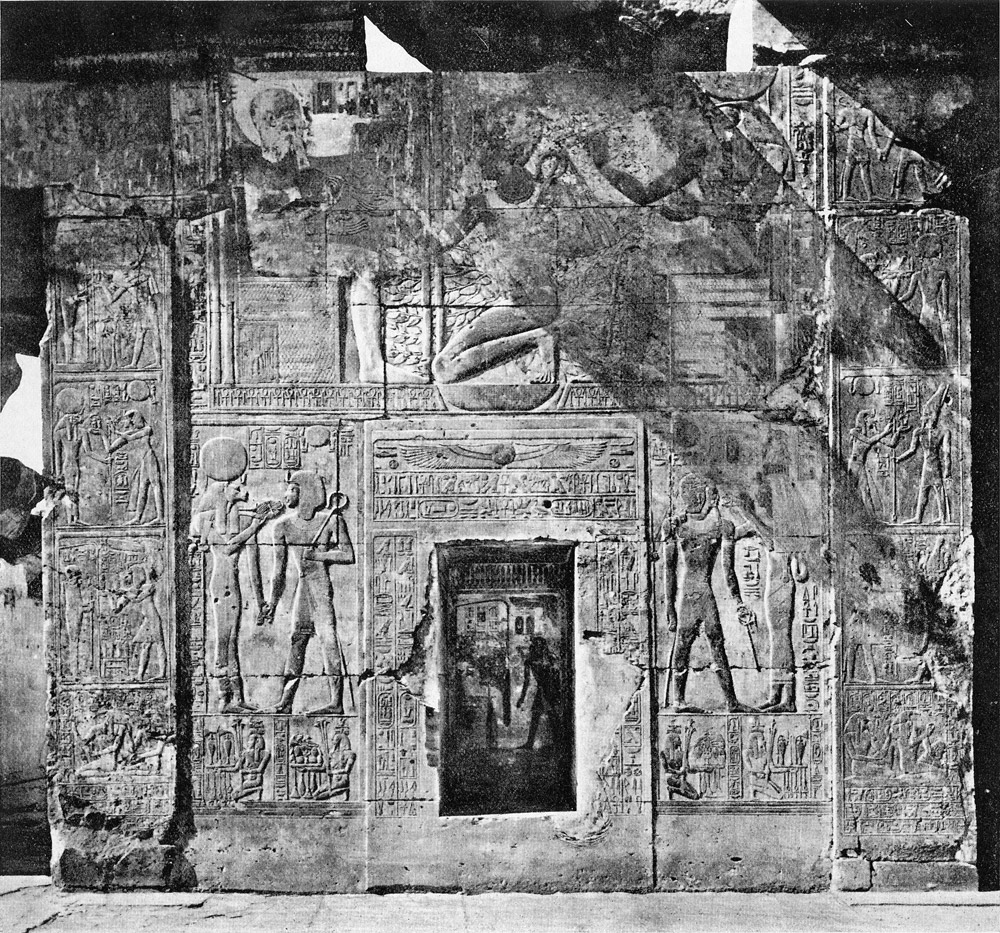
Plate 18. Second Hypostyle Hall.
Wall between the Sanctuary of Ptah and the Sanctuary of Harmakhis.
Wall between the Sanctuary of Ptah and the Sanctuary of Harmakhis.
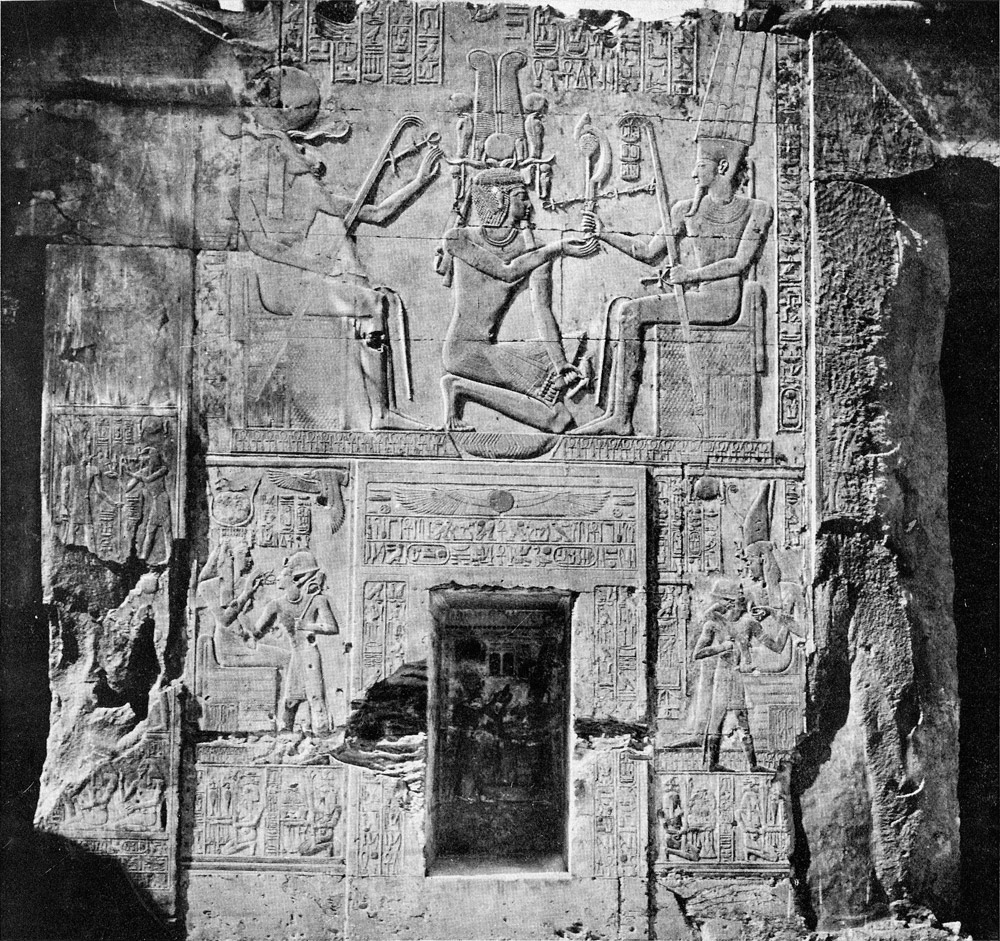
Plate 19. Second Hypostyle Hall.
Wall between the Sanctuary of Harmakhis and the Sanctuary of Amun.
Wall between the Sanctuary of Harmakhis and the Sanctuary of Amun.
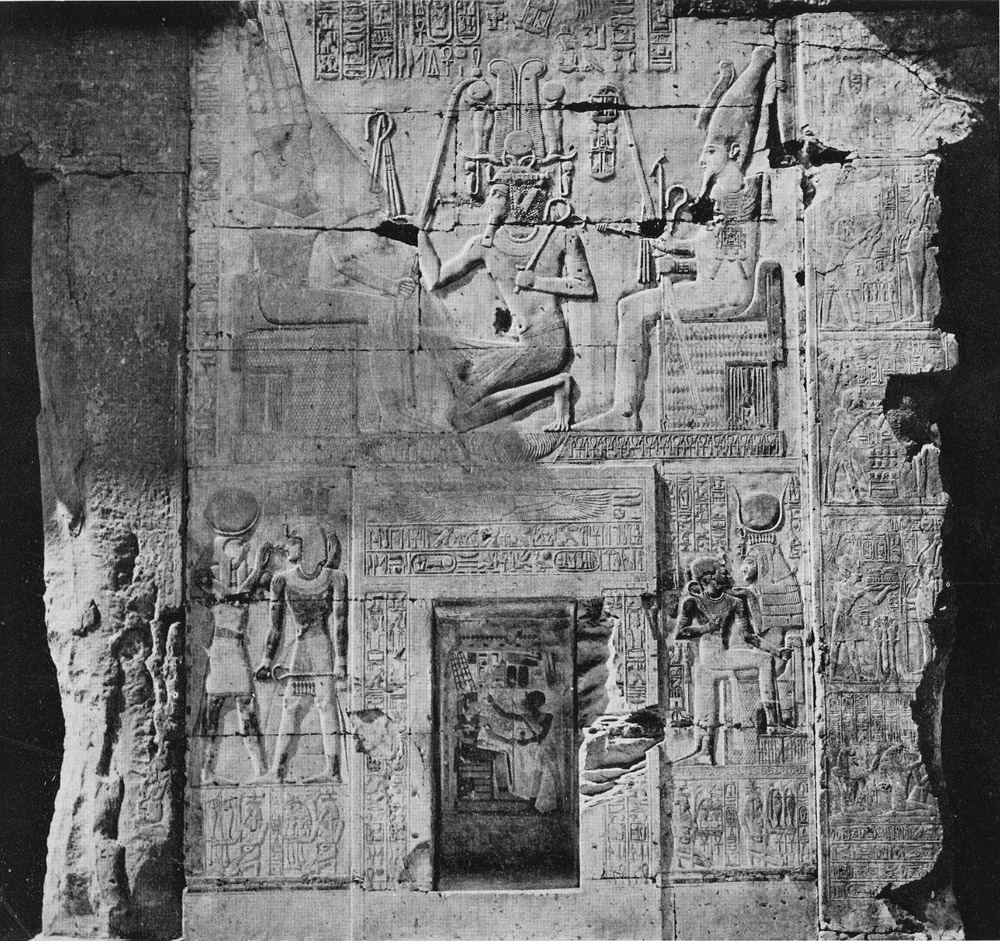
Plate 20. Second Hypostyle Hall.
Wall between the Sanctuary of Amun and the Sanctuary of Osiris.
Wall between the Sanctuary of Amun and the Sanctuary of Osiris.
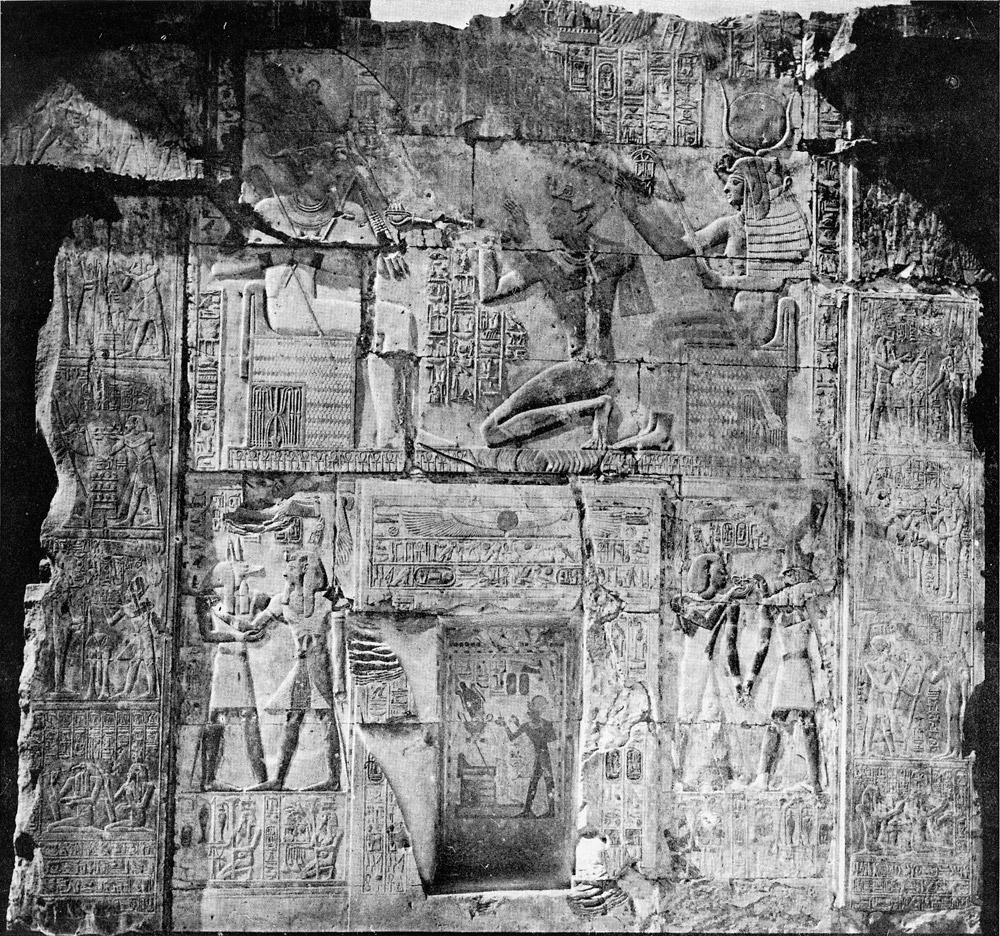
Plate 21. Second Hypostyle Hall.
Wall between the Sanctuary of Amun and the Sanctuary of Osiris.
Wall between the Sanctuary of Amun and the Sanctuary of Osiris.
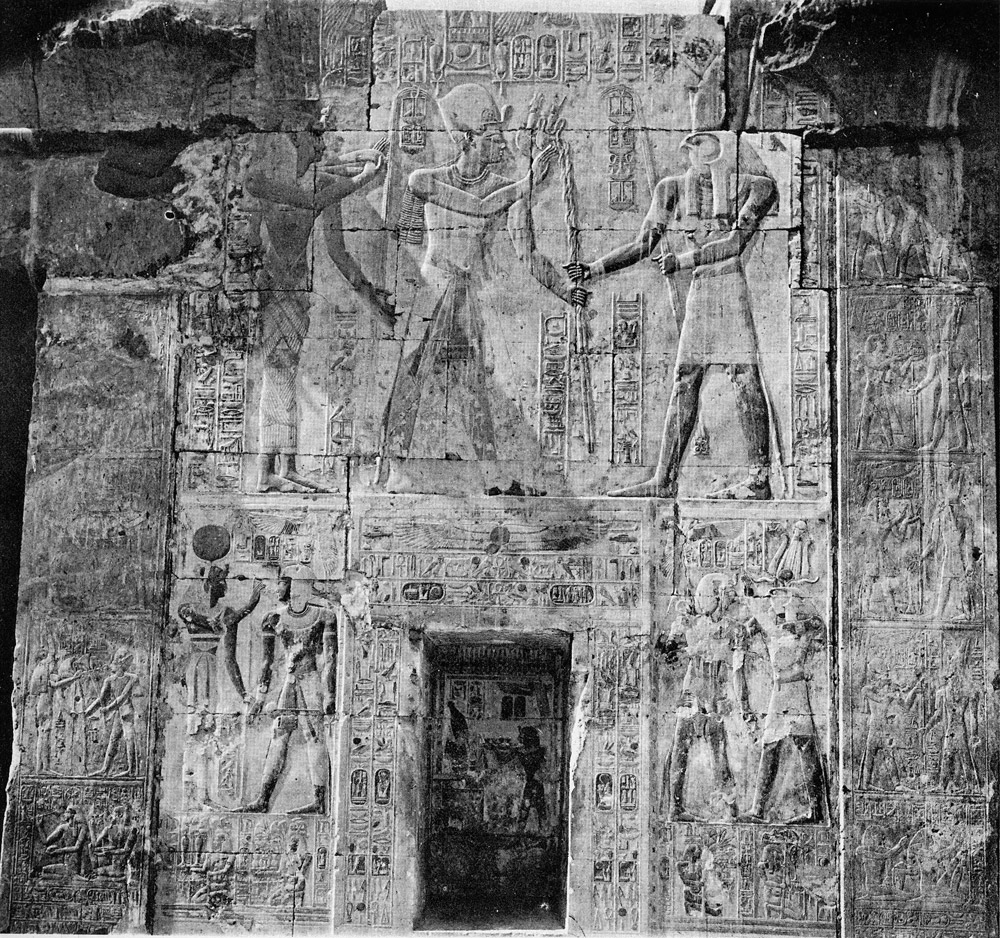
Plate 22. Second Hypostyle Hall.
Wall between the Sanctuary of Isis and the Sanctuary of Horus.
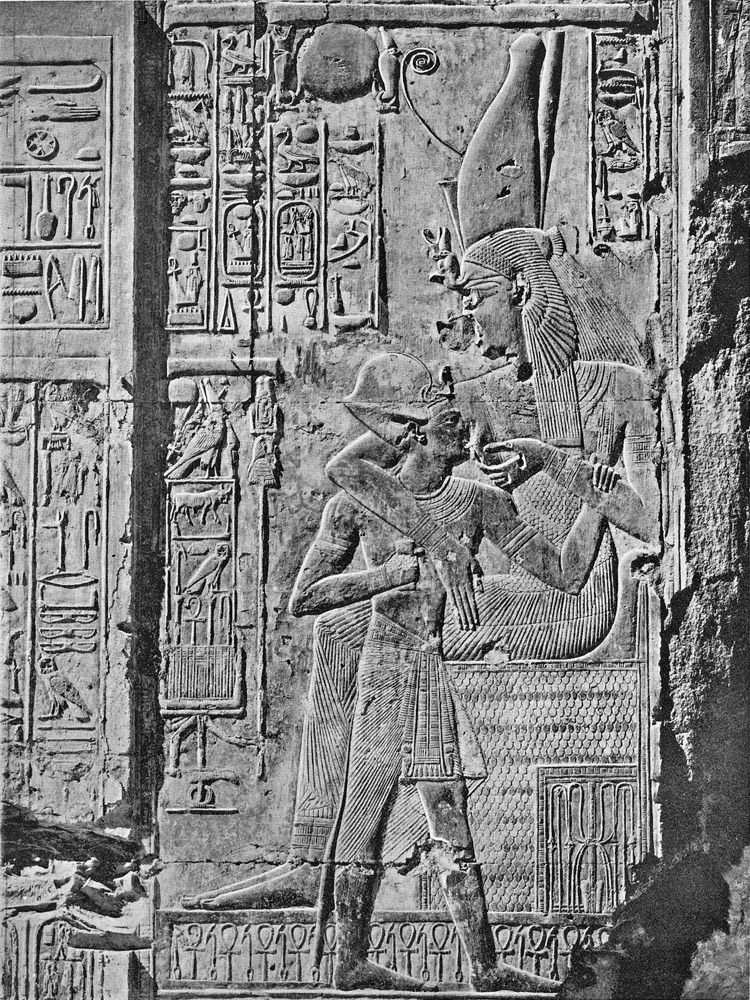
Plate 23. Second Hypostyle Hall.
Detail of wall between the Sanctuary of Harmakhis and the Sanctuary of Amun.
Detail of wall between the Sanctuary of Harmakhis and the Sanctuary of Amun.
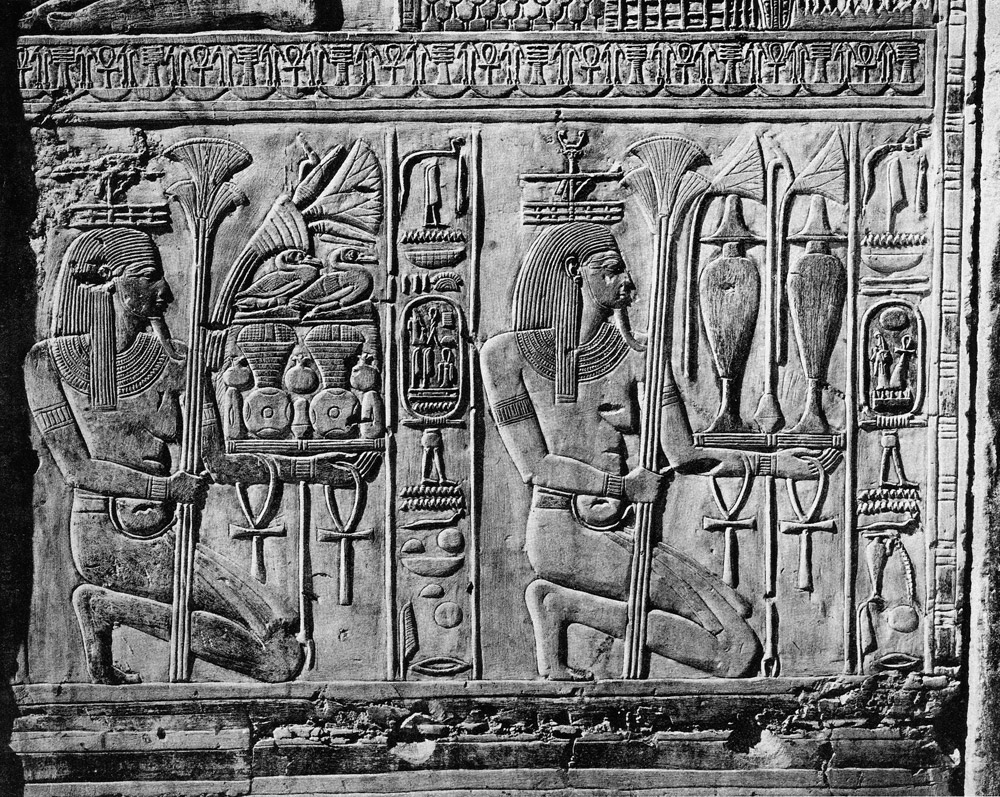
Plate 24. Second Hypostyle Hall.
Detail of wall between the Sanctuary of Amun and the Sanctuary of Osiris.
Detail of wall between the Sanctuary of Amun and the Sanctuary of Osiris.
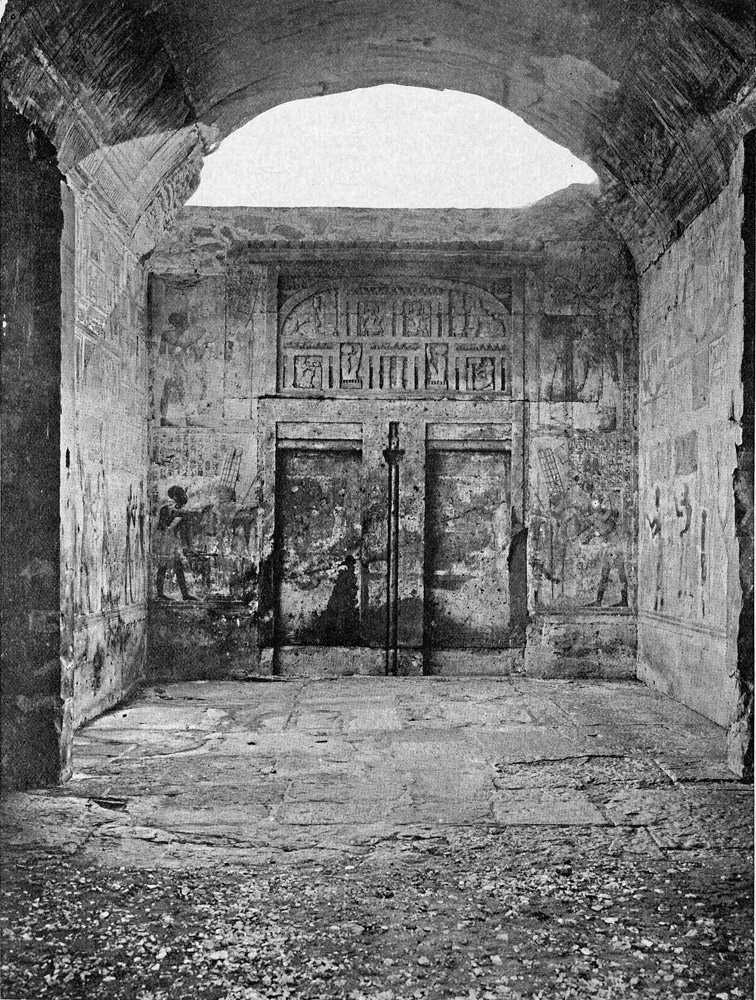
Plate 25. Sanctuary of Amun.
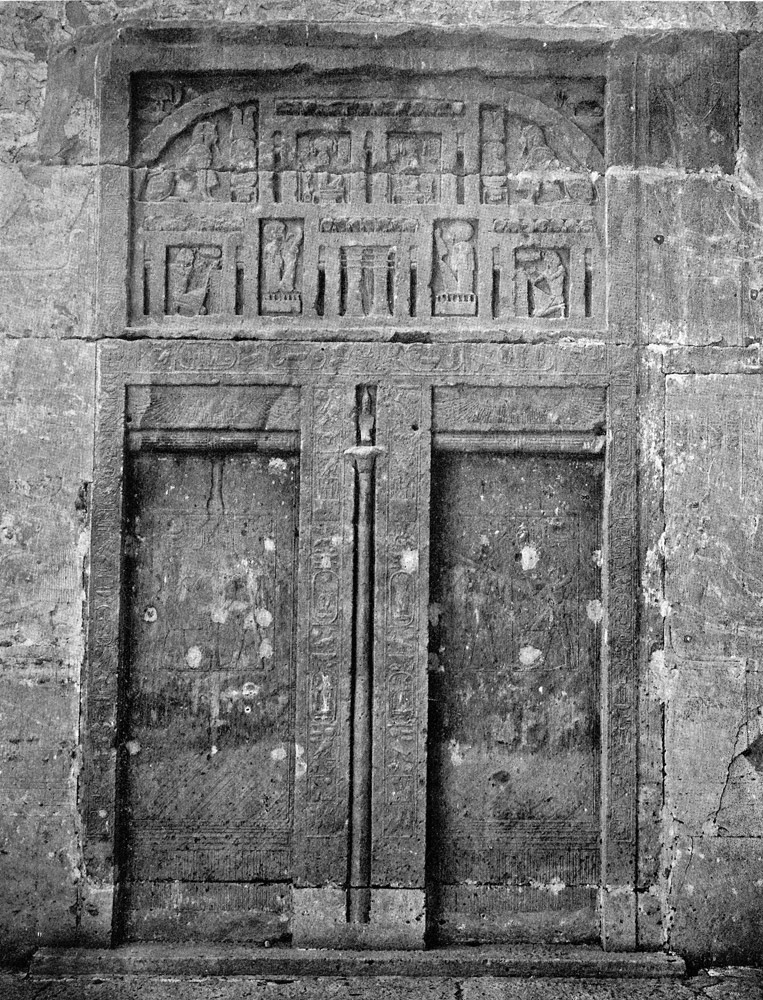
Plate 26. Sanctuary of Harmakhis.
Rear wall.
Rear wall.

Plate 27. Sanctuary of Osiris
North wall, second part.
North wall, second part.

Plate 28. Sanctuary of Osiris.
North wall, second part.
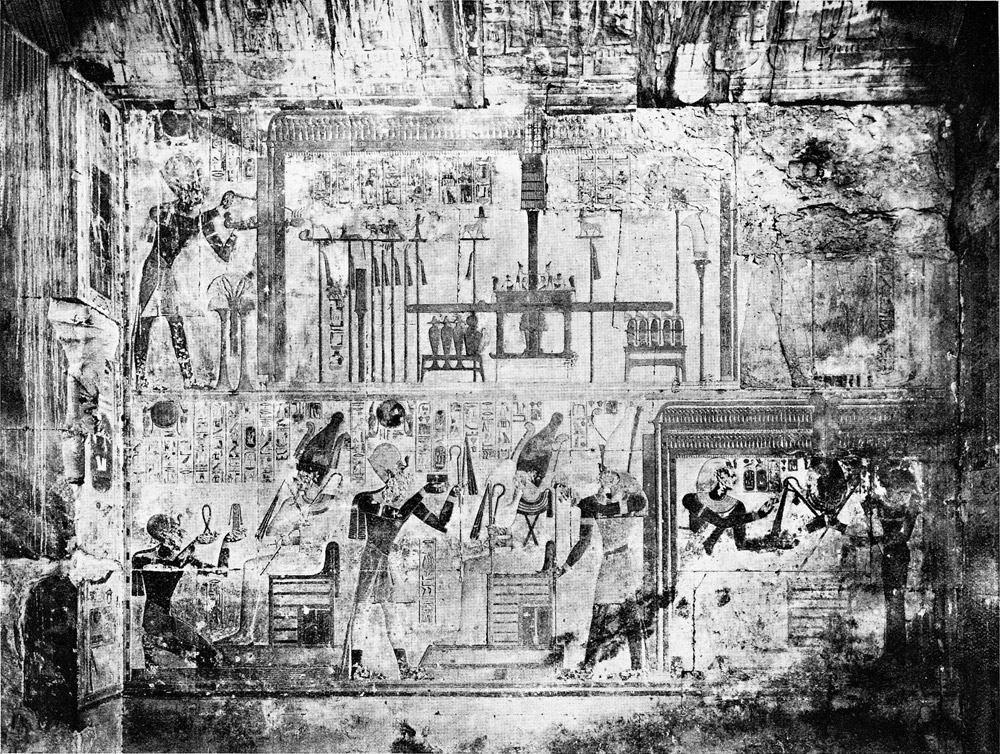
Plate 29. Sanctuary of Osiris.
South wall, second part.
South wall, second part.
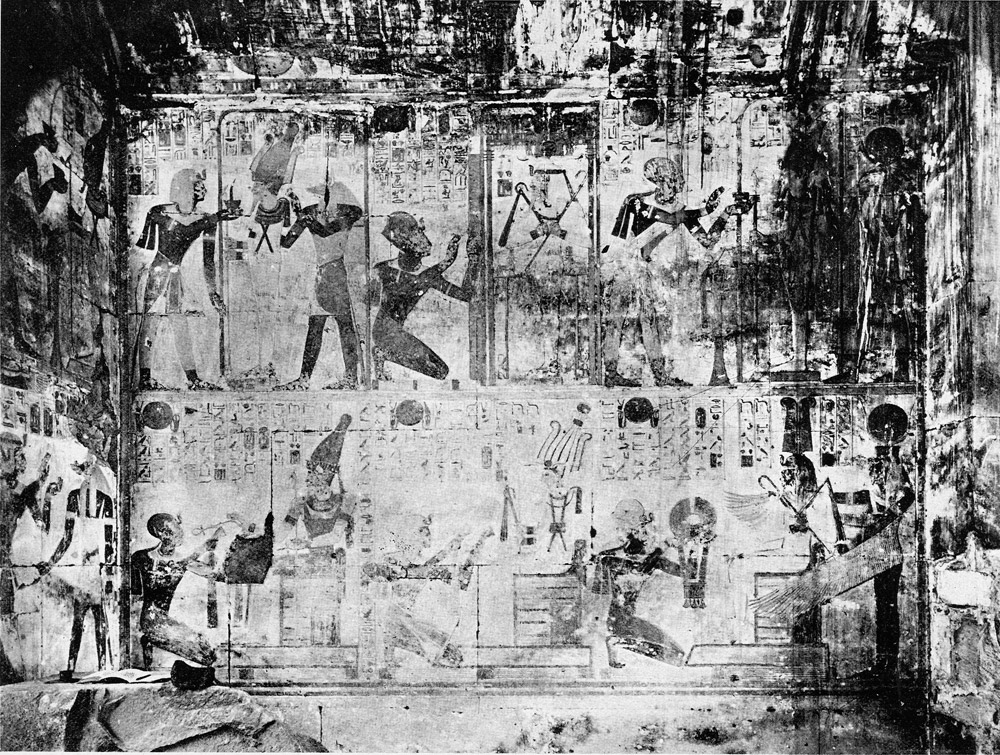
Plate 30. Sanctuary of Osiris.
South wall, first part.
South wall, first part.
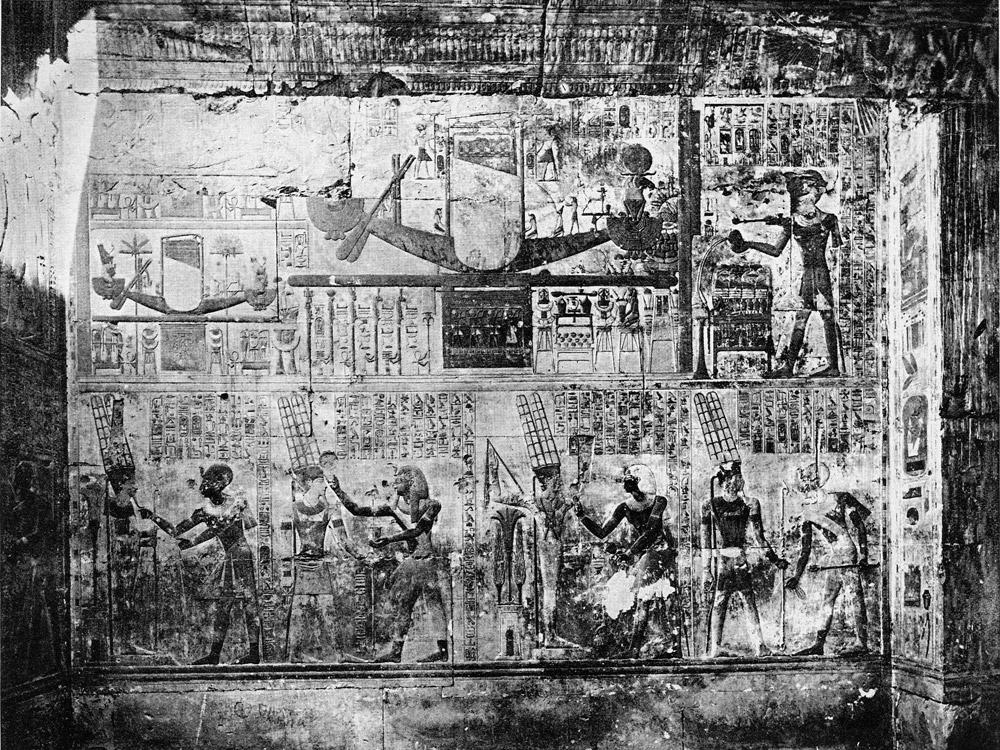
Plate 31. Sanctuary of Amun.
North wall, second part.
North wall, second part.

Plate 32. Sanctuary of Amun.
South wall, second part.
South wall, second part.
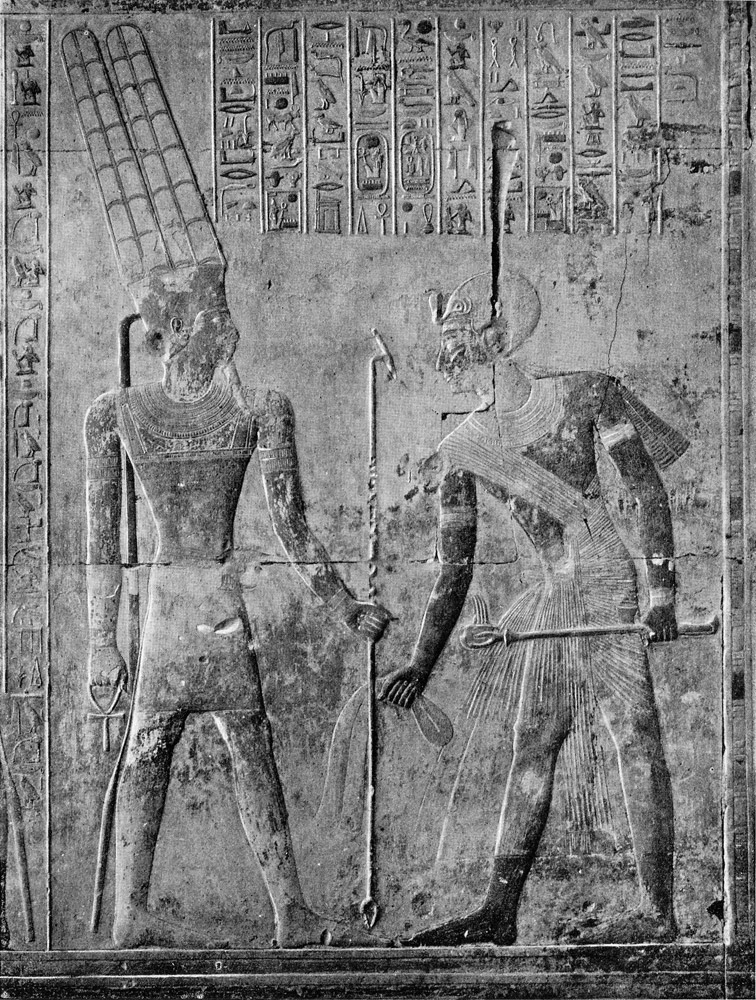
Plate 33. Sanctuary of Amun.
Detail of north wall, second part.
Detail of north wall, second part.
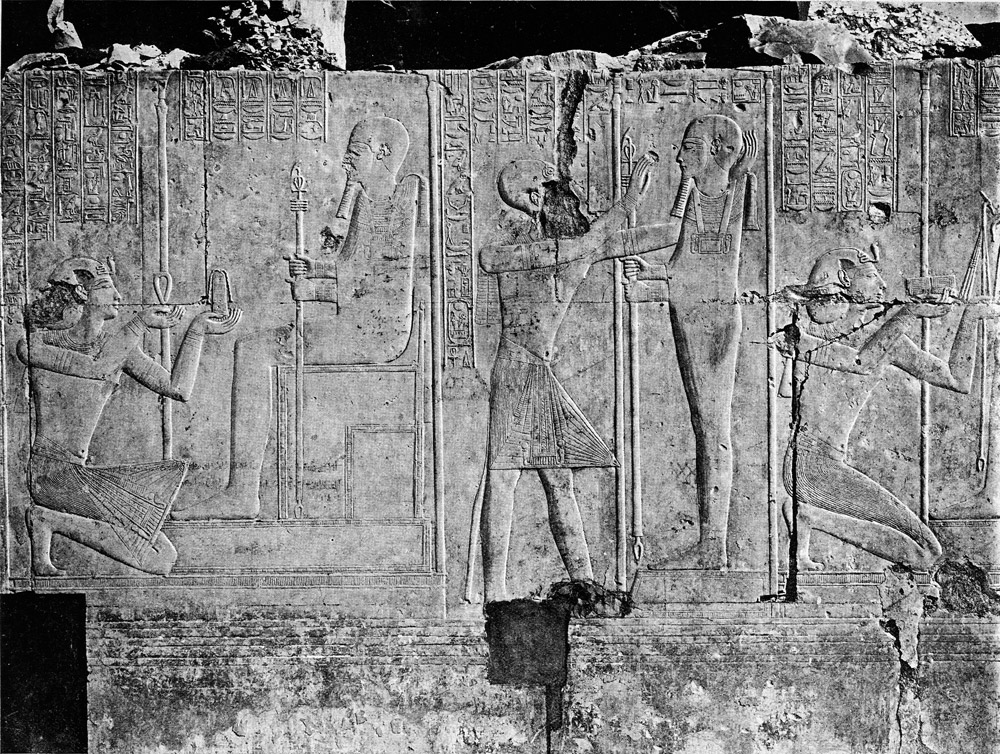
Plate 34. Sanctuary of Ptah.
Detail of south wall, second part.
Detail of south wall, second part.
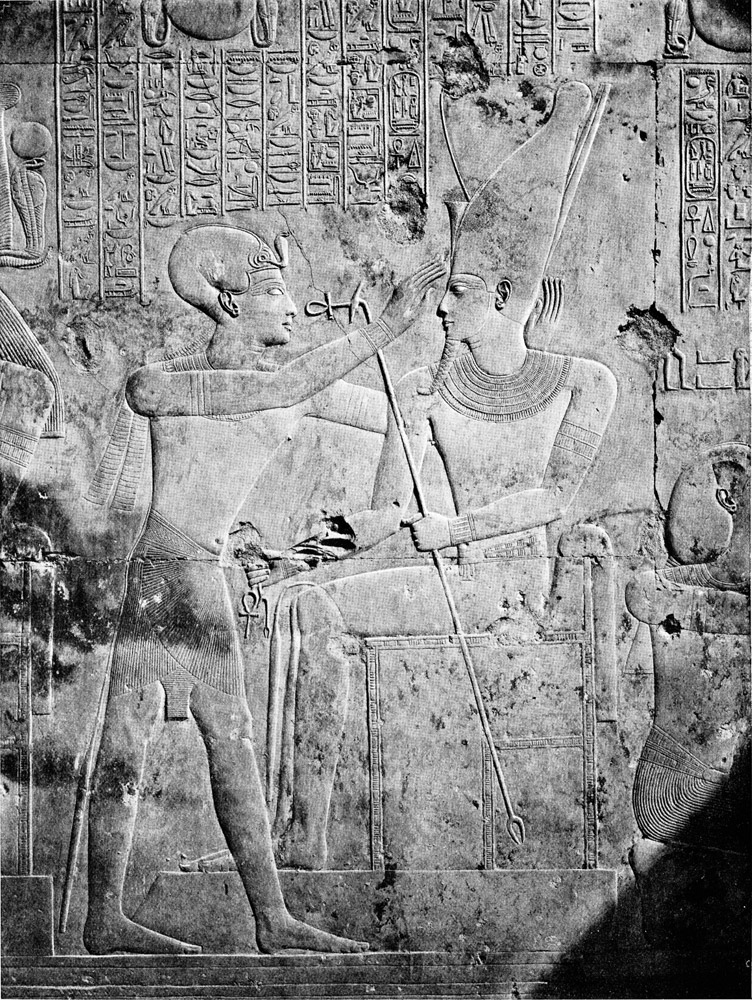
Plate 35. Sanctuary of Harmakhis.
Detail of south wall.
Detail of south wall.

Plate 36. Hypostyle Hall of Osiris.
General view, north side.
General view, north side.

Plate 37. Hypostyle Hall of Osiris.
West wall, first part.
West wall, first part.
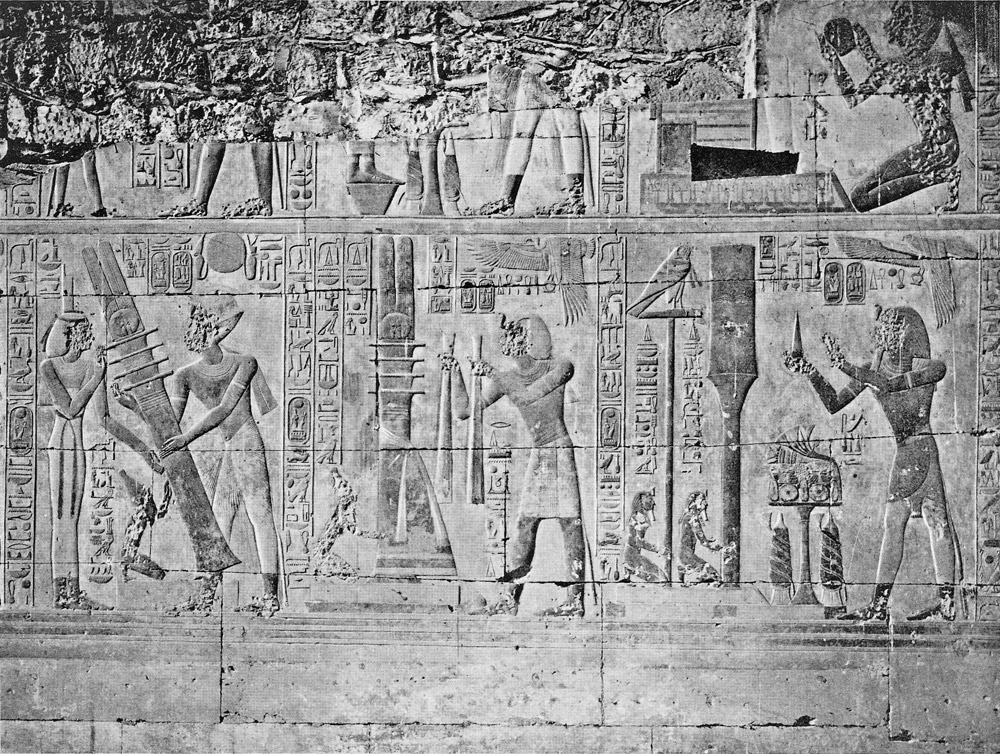
Plate 38. Hypostyle Hall of Osiris.
West wall, second part.
West wall, second part.
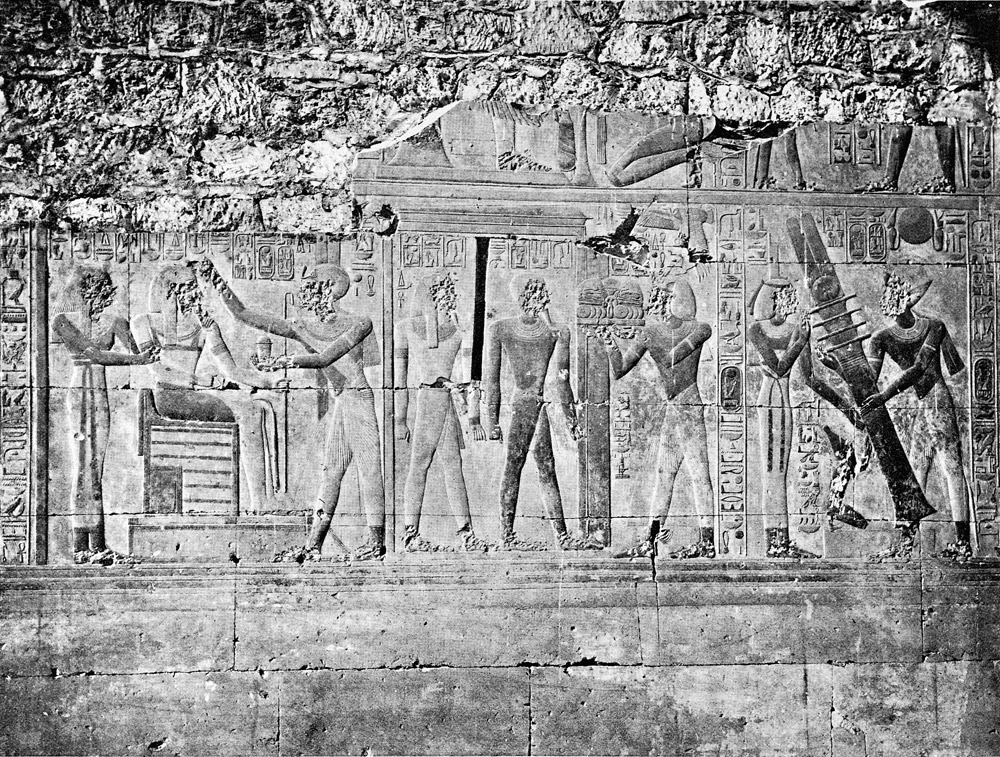
Plate 39. Hypostyle Hall of Osiris.
West wall, third part.
West wall, third part.
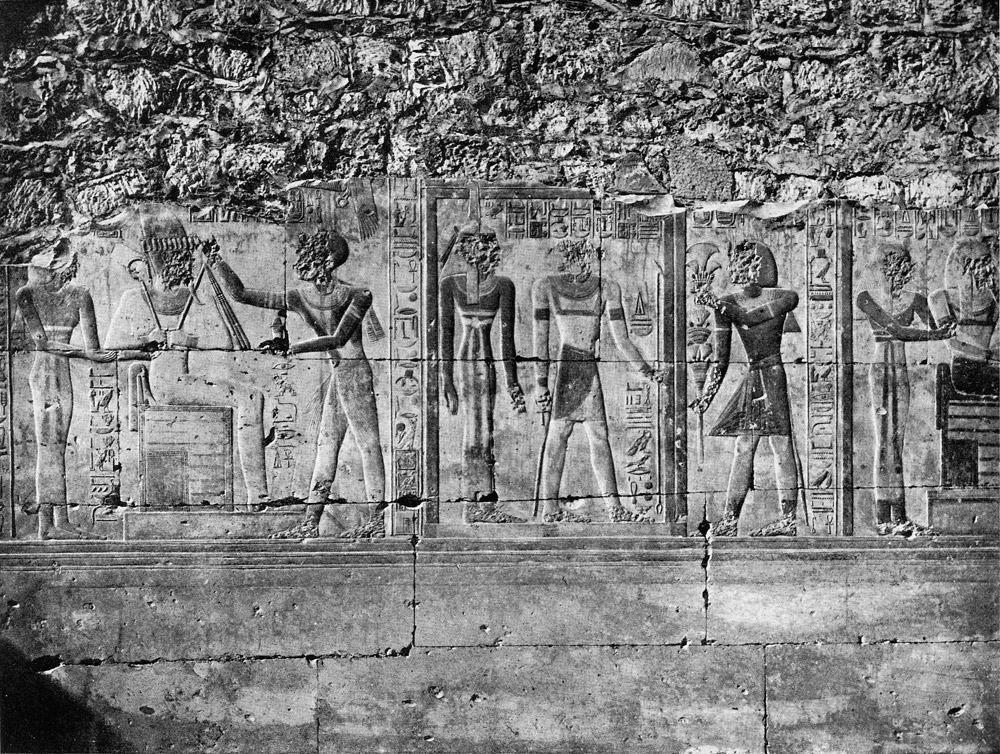
Plate 40. Hypostyle Hall of Osiris.
West wall, fourth part.
West wall, fourth part.

Plate 41. Hypostyle Hall of Osiris.
East wall, first part.
East wall, first part.
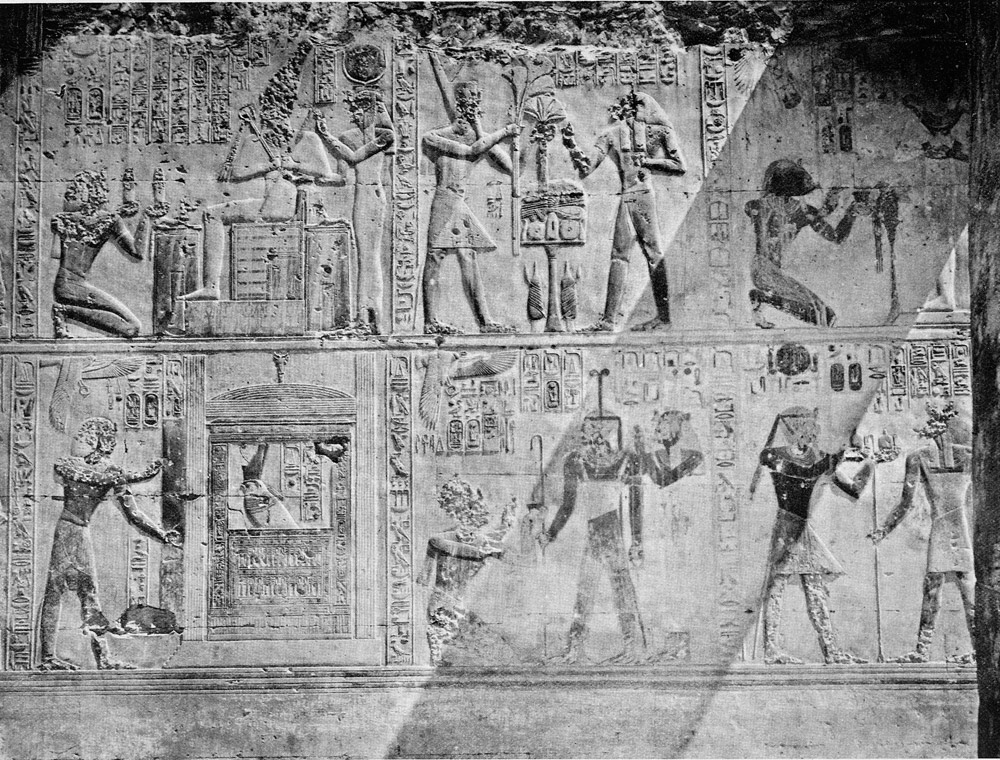
Plate 42. Hypostyle Hall of Osiris.
East wall, second part.
East wall, second part.
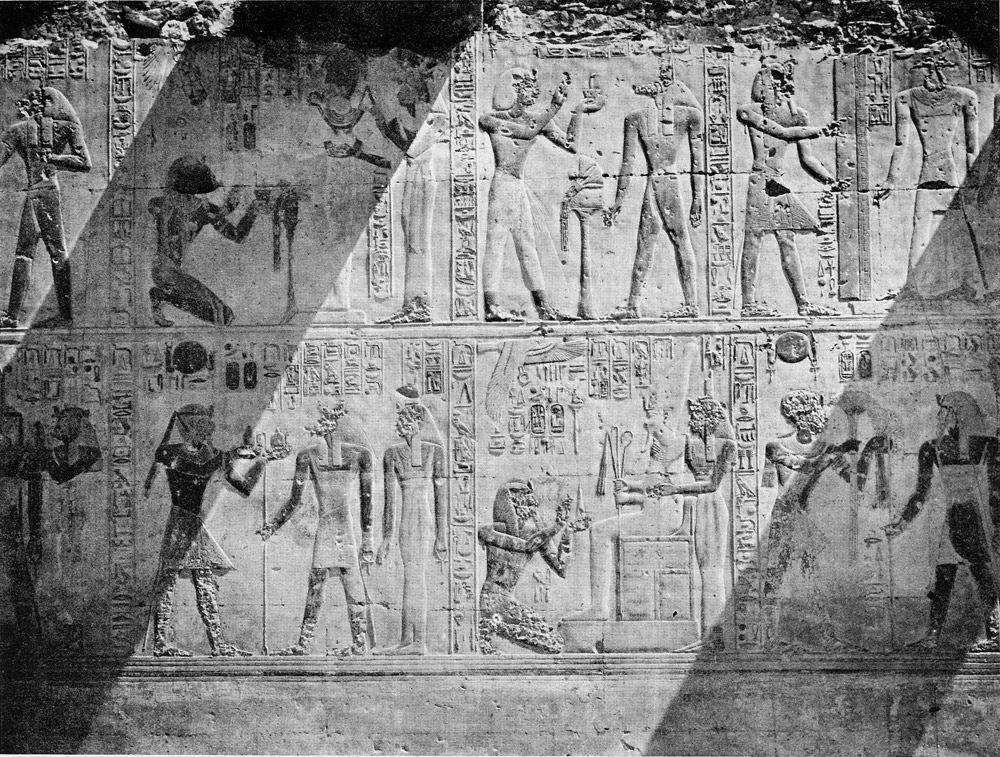
Plate 43. Hypostyle Hall of Osiris. East wall,
third part.
third part.
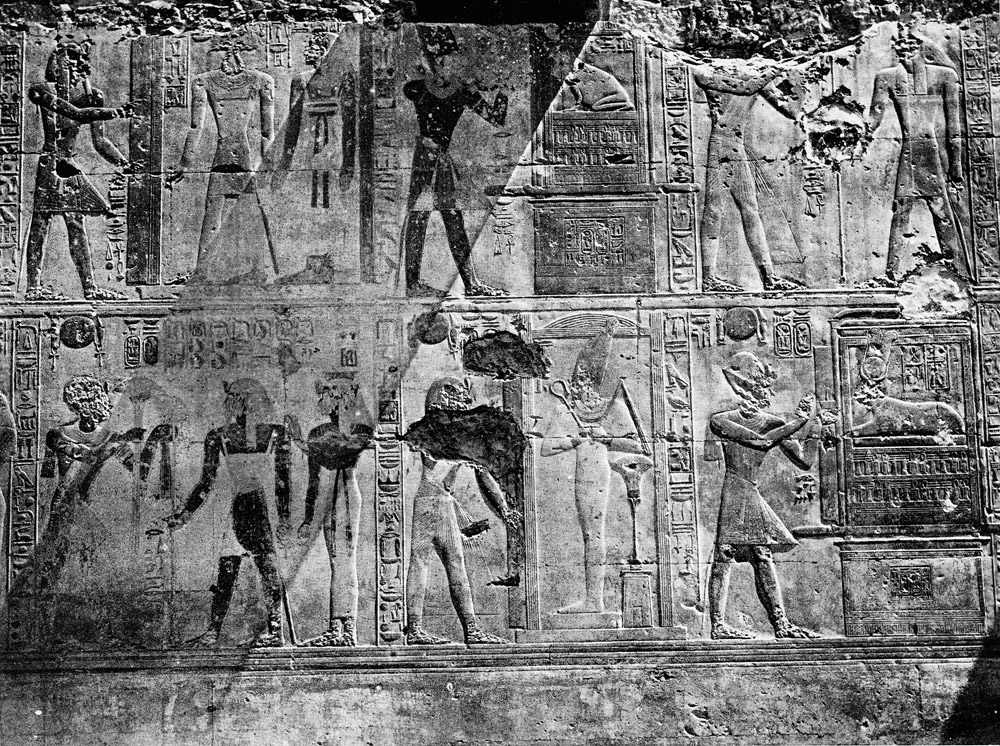
Plate 44. Hypostyle Hall of Osiris.
East wall, fourth part.
East wall, fourth part.
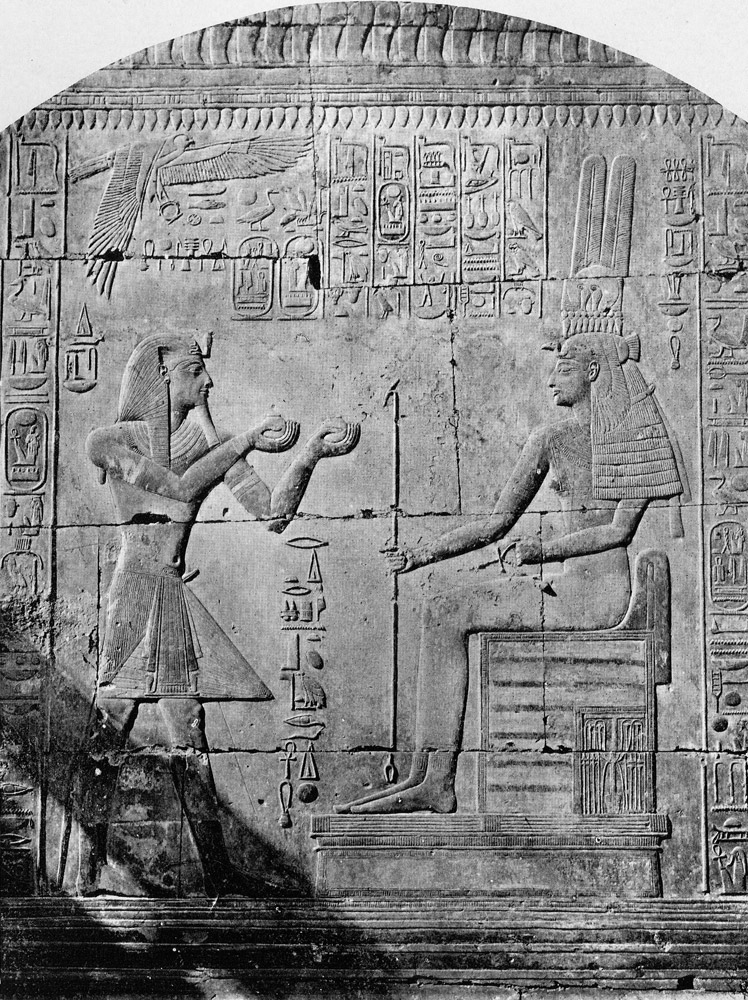
Plate 45. Chapel of Isis.
East wall, second part.
East wall, second part.
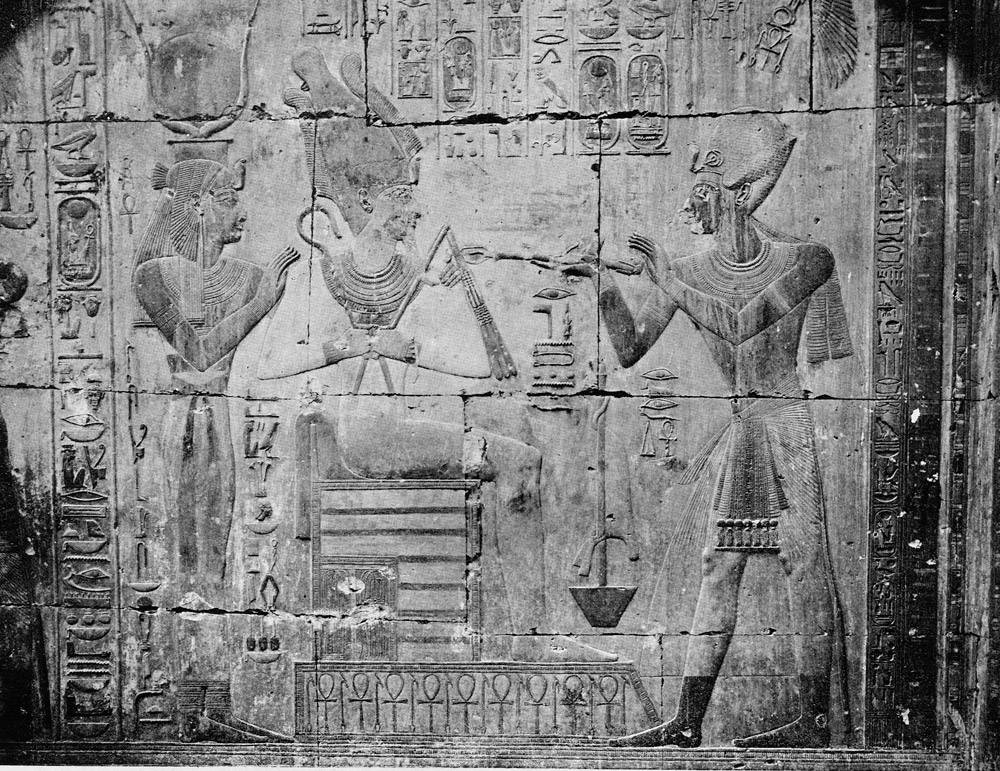
Plate 46. Chapel of Isis.
East wall, first part.
East wall, first part.
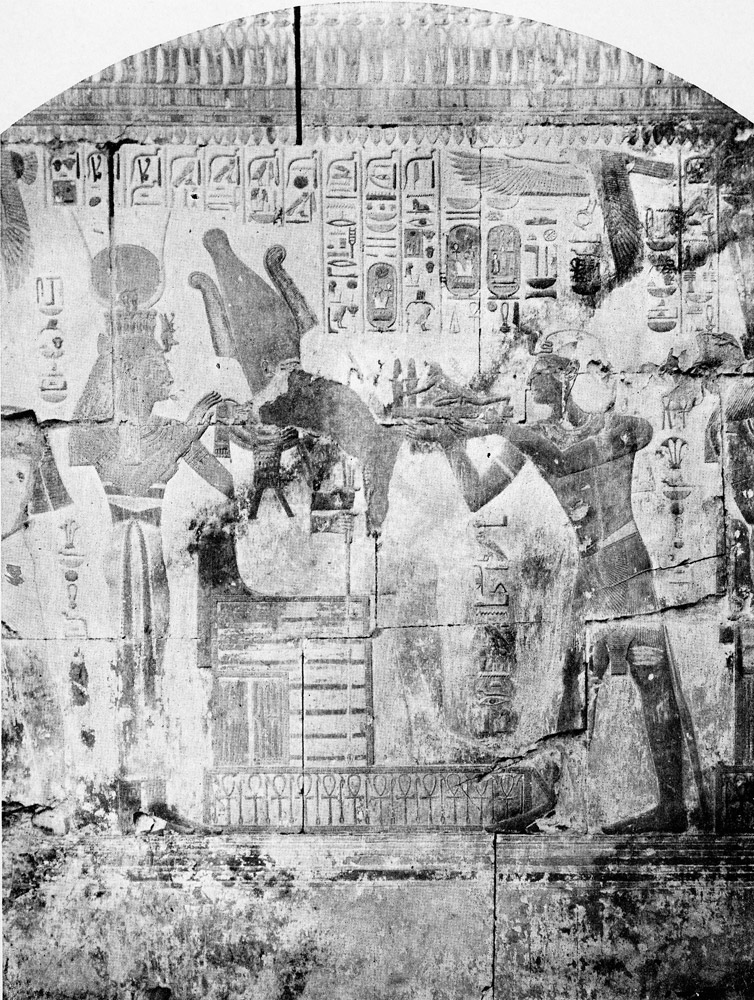
Plate 47. Chapel of Horus.
East wall, first part.
East wall, first part.
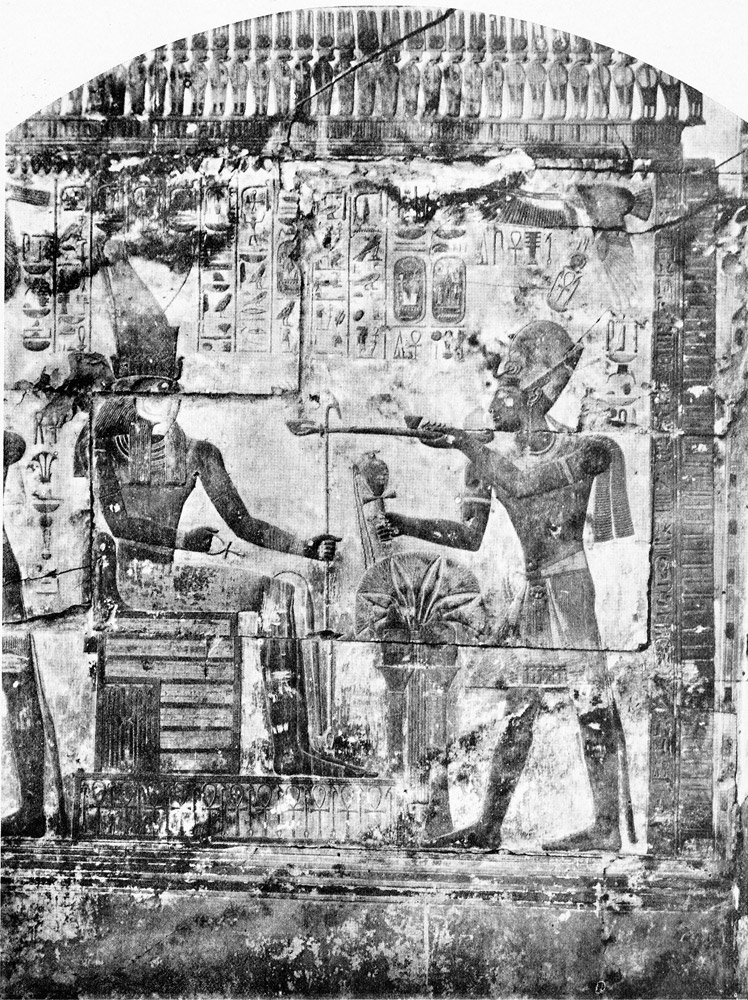
Plate 48. Chapel of Horus.
East wall, second part.
East wall, second part.
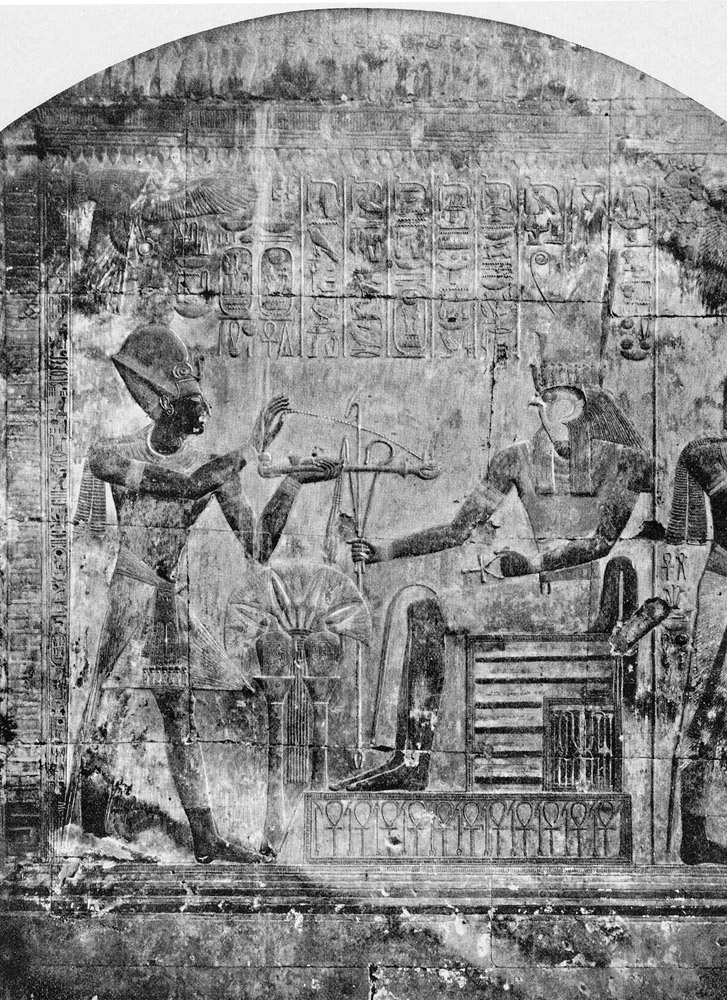
Plate 49. Chapel of Horus.
West wall, first part.
West wall, first part.
Plate 50. Chapel of Horus.
West wall, third part.
West wall, third part.

Plate 51. Chapel of Osiris-Seti.
East wall, first part.
East wall, first part.
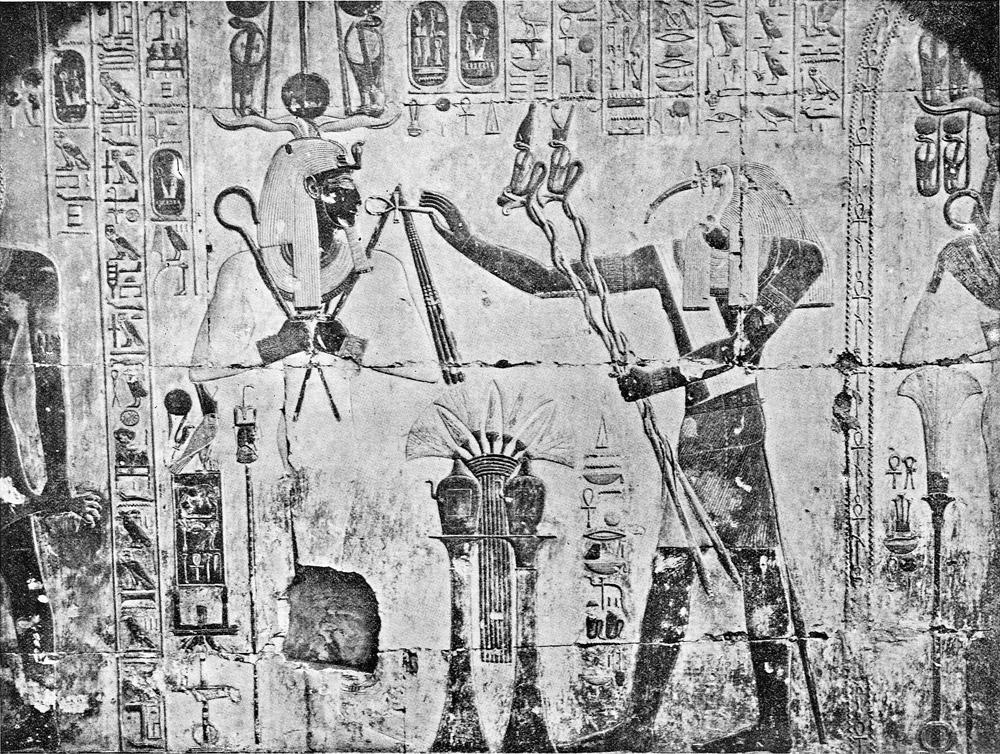
Plate 52. Chapel of Osiris-Seti.
East wall, second part.
East wall, second part.
Plate 53. Chapel of Osiris-Seti.
East wall, third part.
East wall, third part.
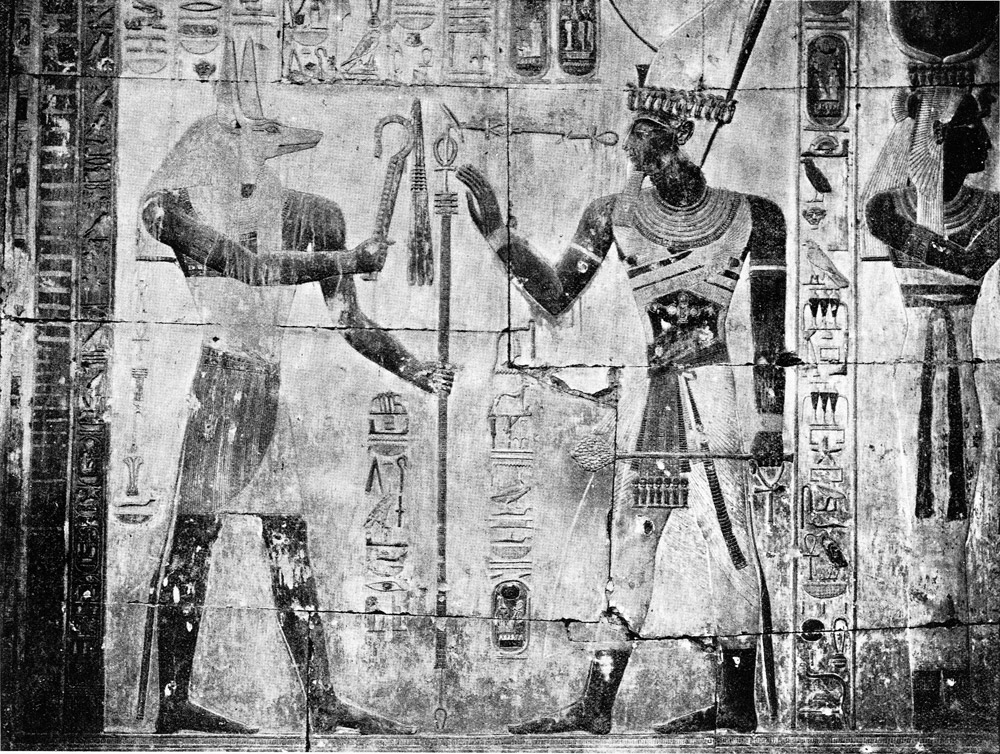
Plate 54. Chapel of Osiris-Seti.
West wall, first part.
West wall, first part.
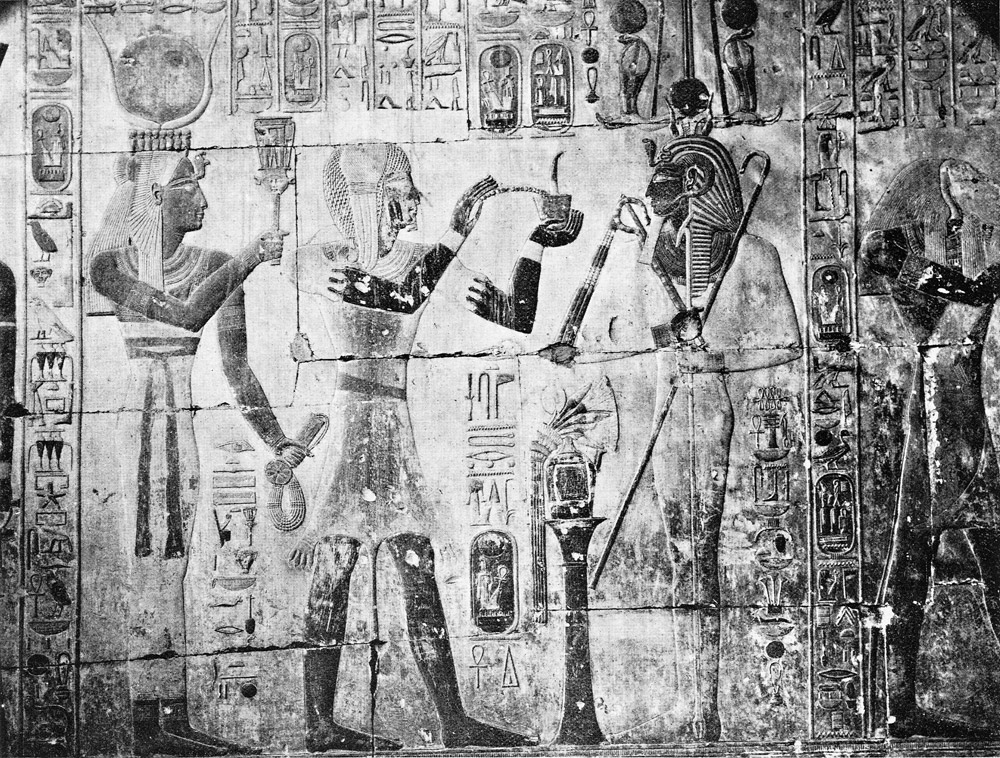
Plate 55. Chapel of Osiris-Seti.
West wall, second part.
West wall, second part.
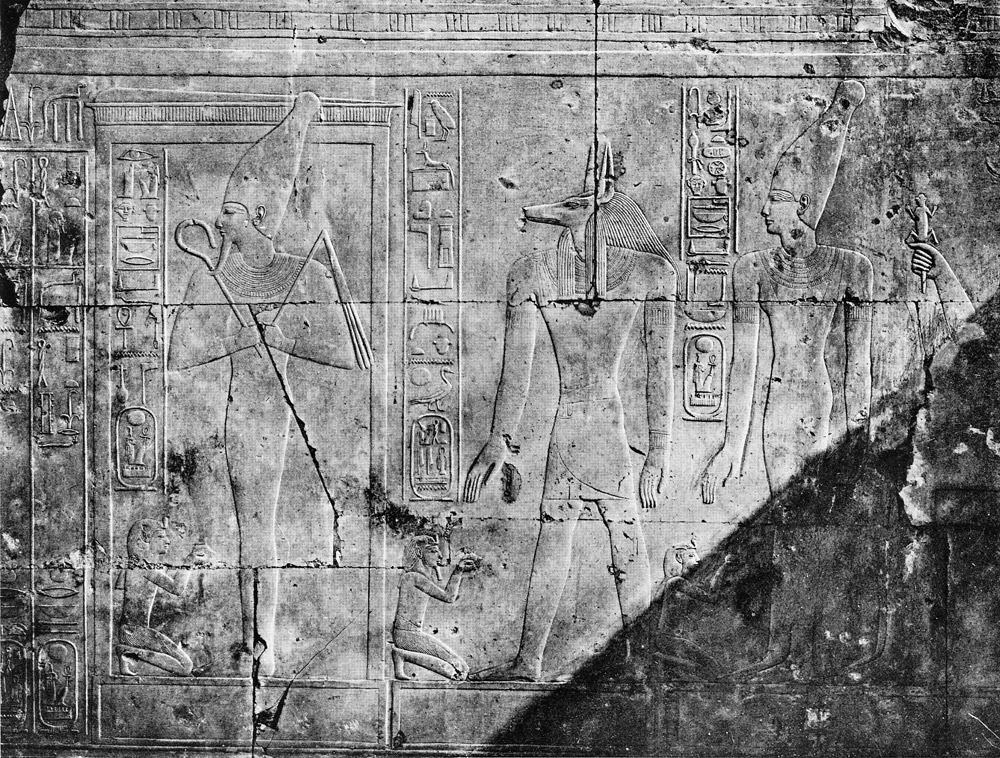
Plate 56. Chapel of Sokaris (Sokar/Seker).
Detail of the south wall, higher register.
Detail of the south wall, higher register.
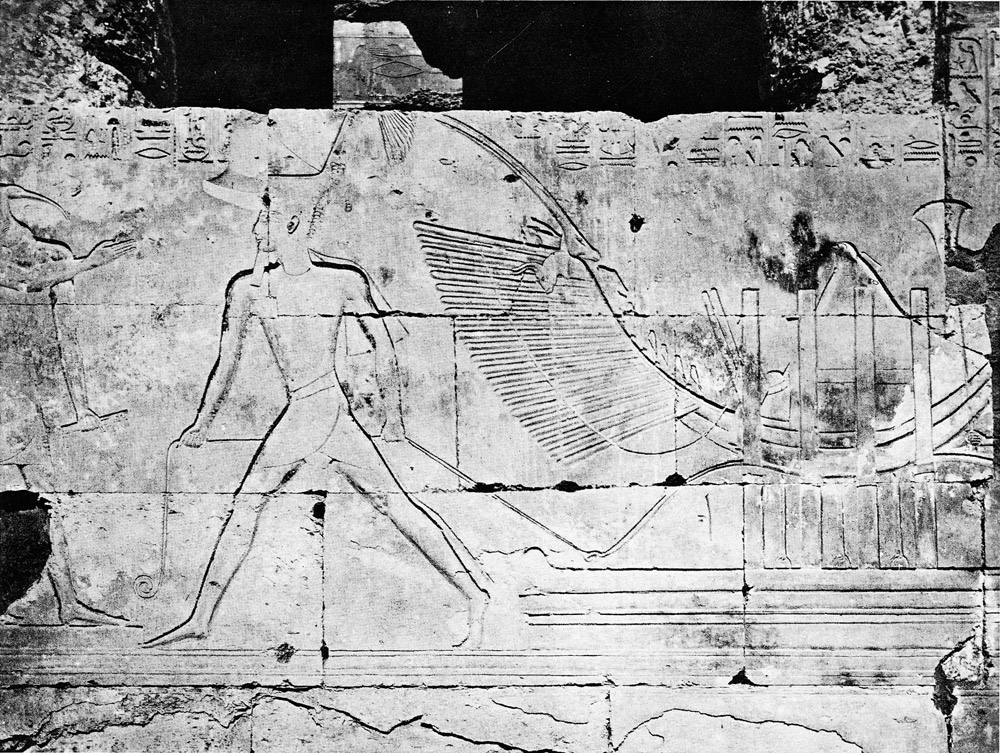
Plate 57. xxxxxxx
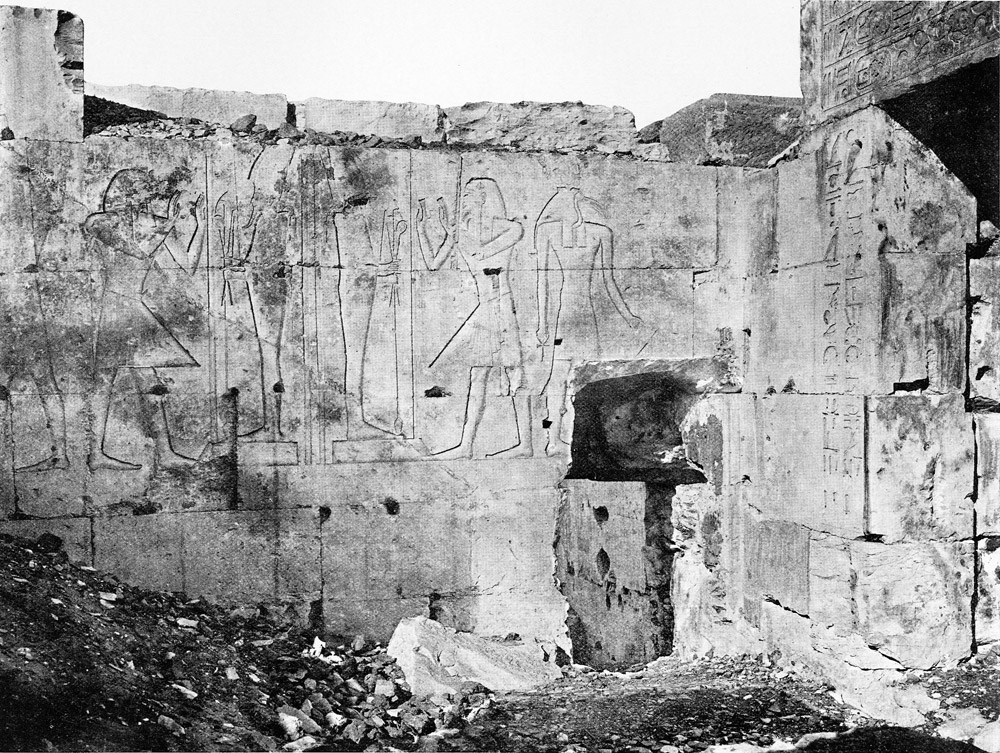
Plate 58. Single-storeyed rooms.
Reliefs of Seti II.
Reliefs of Seti II.

Plate 59. Abydos plan